Magazine Archive
Home -> Magazines -> Issues -> Articles in this issue -> View
Cubase MIDI Mixer (Part 1) | |
Programming ClinicArticle from Sound On Sound, October 1992 | |
Few Cubase users take full advantage of its powerful MIDI Mixer module — daunted by its apparent complexity, they pass up the chance to exploit a powerful and flexible MIDI control tool. Ofir Gal presents a practical 2-part guide to customising and using the MIDI Mixer.
Every Cubase user knows that among the modules included with the basic program is one called the MIDI Mixer, but many are baffled by the apparent complexity of this page. This is a shame, because the MIDI Mixer can be a highly creative tool, allowing you to expand the sonic range of your music. I will try to showhere how the MIDI Mixer works and, furthermore, how you can create your own customised mixer maps and use them as an integral part of your music. All examples relate to the ST version, but should be easily adapted to work on the Mac version as well as the PC Windows version.
WHAT DOES IT DO?
The idea behind the MIDI Mixer is simple enough — it allows the user to create screen objects of various shapes and sizes which can be used to send out almost any MIDI message to any MIDI device. Why would you need or even want to send custom MIDI messages to your synthesizer or sampler? Because, in addition to notes, pitch bend, aftertouch and modulation, there are many more ways to affect the sounds your synths are capable of generating, adding complexity and richness to the timbres you use. Ultimately, this means that your music can be more expressive. With many synthesizers, for example, it is possible to change the filter setting in real time, so you can modulate filter cutoff and resonance in real time using system exclusive messages. Another possible use is with mixing desks that support MIDI muting; a map can be created to control all muting, with the benefits of on-screen mute buttons and proper event chase. Cubase (v3) will allow you to have up to eight mixer maps in memory and many more on disk, each one with up to 128 objects, so you can create a map for each of your MIDI devices. The MIDI Mixer can also be used to reset your whole setup to some pre-defined configuration. I use it to set all my synths to maximum volume, centre pan, memory protect off, omni off, local off, and so on, at the beginning of a programming session. With the introduction of General MIDI, even more parameters are now easily accessible with the MIDI mixer. Effects units like the Quadraverb or the Eventide Harmoniser can also be controlled with the mixer, allowing you to change reverb time or any other parameter half-way through a song. When an object is moved with the mouse, its corresponding MIDI message is sent to the synth and takes effect immediately. You can record object movements in a Cubase song, and each time the song is played, the same MIDI events will be sent to your synths, changing parameters on the fly.
CREATING AN OBJECT
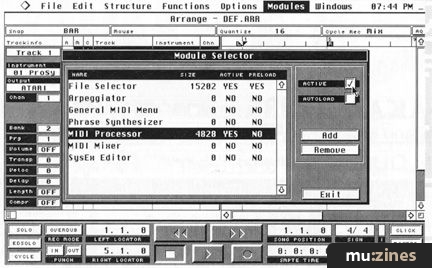
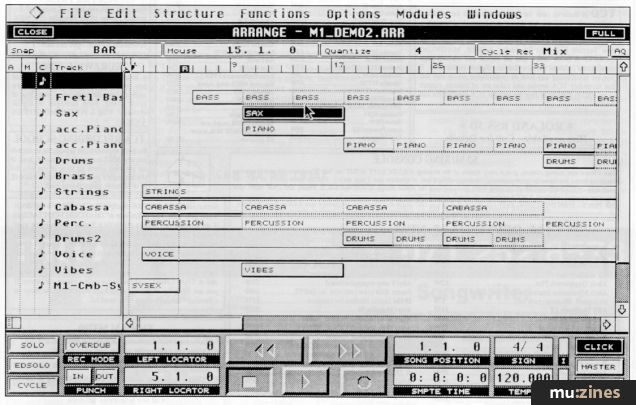
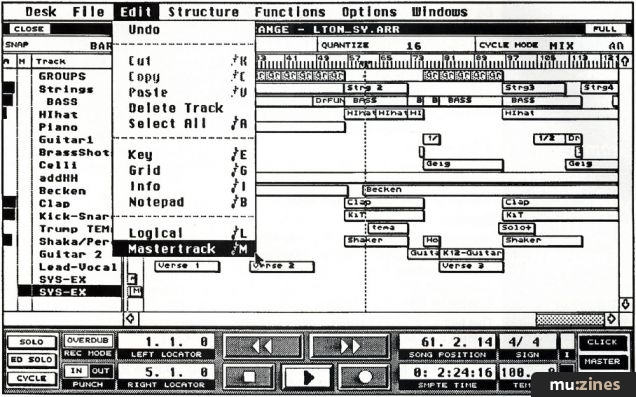
To get to the MIDI Mixer, you must make sure the module is active. If it isn't, select the modules menu, click once on the MIDI Mixer entry, then click Active. You can have the MIDI Mixer load automatically by placing a tick in the autoload box. Next select Track 1 and set its class to Mix Tracks by clicking on the note symbol in the 'C' column. Now create a part — I normally have one long part for the whole song, which ensures event chase throughout the song. Next, double-click on the part and the mixer window will open. If necessary, click on the full box at the top right corner. Cubase is shipped with a default mixer map, containing some faders, pan pots and dials. It is best to remove these by holding down the Control key and typing A, then hitting delete. Now we have an empty window and we can create the first object.

Selecting the MIDI Mixer module.

Make Track 1 a Mix Track.

Selecting a new object.
Click on the right mouse button to display the tools and select New. Now click anywhere on the screen and the Object Definition box will open. At first glance, the definition box looks complex, but once you get familiar with it, you will be able to use it just like any other feature of Cubase. The various parameters are explained in your user's manual, so I will concentrate here on the most important ones, namely the MIDI message line and the value parameters.

The Object Definition dialogue box.
The first object will use controller #7 to control the volume on the selected channel. The object can be named and assigned to any channel using the appropriate buttons. The MIDI message itself is rather simple to construct, and Cubase goes a long way to help you. Just above the message line itself are two boxes — Status and Extra. Click on the Status box and select ContChange. Next, click on the Extra box and a menu displaying all available controllers will appear. Now you can simply select Main Volume. These two last operations will enter the values B0, 07 in the message line. These should be followed with XX, which Cubase has entered for you. The XX is the variable which the object itself would determine, B0 is the status byte for MIDI controllers and 07 is controller number 7. Since the object will regulate volume, a fader will be ideal; you can select either a horizontal or vertical fader by clicking the Type box. Use the MIDI Output box to select the MIDI channel or instrument you want to control. Click OK to exit the dialogue box.

Selecting Main Volume as the controller message for the current object.
Before you can use the fader, you may need to resize it: click the right mouse button and select the standard arrow from the tools. Next, click with the left button on the bottom right corner of the new object and drag the mouse downwards. Once the object is ready, select the pointing finger tool by clicking the right mouse button. The object is now ready for use!
Now use the mouse to move the fader and thereby send the volume message to your synth — if all is well, this should change the volume level on your synth. If not, check your synth's MIDI implementation; maybe it does not respond to MIDI volume. With the object now created and working as intended, you can now record the movements. To do so, click a couple of times on the Mode box at the top left of the MIDI Mixer window until it shows Write. Now rewind Cubase and start it. To record mixer events you simply move the fader; there is no need to press the record button. Once you're done, rewind Cubase, and click play. This time there is no need to touch the object — it should move on its own!
Objects can be copied, just like Cubase parts, by dragging the object while holding Alternate, or by using Copy and Paste. This way you can quickly create volume faders for all 16 channels.

The dialogue box for loading/saving your mixer maps.
MIDI MESSAGES
Before we go any further, let's take a brief look at how MIDI messages are structured. All MIDI messages are made of a stream of computer bytes sent down the MIDI lead. A Note On message, for example, is used to play a note, and is made of three bytes.
The first, called the status byte, is used to indicate the event type. The second byte carries the note number, while the third byte is the velocity. For reasons that need not concern us now, MIDI values are normally written in hexadecimal notation, which can be a little confusing. At the end of the MIDI Mixer section of the manual you will find a useful conversion table that lists decimal values with their hex equivalents.
Typically, you would want the mixer to send controller, program change, or SysEx messages rather than Note Ons. Controller events also consist of three bytes. The first byte is always B0 (176 in decimal) and indicates that this is a controller message. The second is the controller number, which will be between 0 and 127. As you have seen earlier, Cubase displays the controllers by name to help you choose the right one, so there is no real need to memorise all the controllers. Note that, since the development of General MIDI, some previously undefined controllers are now part of the MIDI spec. Unfortunately, these new controllers have not yet been renamed in Cubase — controller #91, for example, is no longer ExtOff but Reverb Depth.
The third byte of a controller message is the controller value. If you create a MIDI Mixer object to generate controller messages, when you move it, the value it displays replaces the XX in the message, as above, and the full controller change message is then sent. Different synthesizers will have MIDI implementations of varying degrees of complexity. Most synthesizers respond to controller #10 (panning), #5 (portamento time), #65 (portamento switch), #7 (volume), and #1 (modulation wheel). To find out which controllers your synths will receive, check the MIDI implementation charts.
Program change messages consist of only two bytes. The first is always C0, while the second byte is the program number. The message line should read: C0, XX. The ideal object for controlling program changes is the dial which is, again, available from the Type menu in the object definition box. Many synthesizers have more than 128 programs or sounds and, unfortunately, a bank change controller has only recently been defined. Many instruments, however, have their own protocols for enabling remote selection of more than 128 patches, and in most cases a bank change is possible with the use of SysEx messages.
SYSTEM EXCLUSIVE MESSAGES
SysEx messages are different creatures altogether to controller messages. To start with, a system exclusive message is, by definition, exclusive to a specific synth — a SysEx message defined for a D50 will not have any effect on a D110 and vice-versa. In addition, their length is not fixed, and can be anything from six bytes to thousands of bytes.
SysEx messages can be divided into two categories: bulk dumps, which are used for storage of sound data and are generally quite long; and parameter change messages, which are normally between six and 12 bytes long. Satellite, the desk accessory that comes with Cubase, is designed to cope with bulk dumps, whilst the MIDI Mixer can easily be configured to send parameter change messages, enabling the user to create a DIY synth editor.
A typical SysEx message starts with F0, indicating that this is a SysEx message, which is followed by the manufacturer's ID. Next comes the device number, or MIDI channel, followed by the model ID (to identify specific models within a manufacturer's range). This structure ensures that a message for one synth will be ignored by any other MIDI device, even if it is made by the same manufacturer. This is followed by the data bytes, and the whole message is terminated with an F7 byte.
To create a SysEx object, use the Status menu in the object definition box to select 'SysEx', and Cubase will insert the value F0 in the beginning of the message line. Unfortunately, that is all the help Cubase can offer you; to choose the correct bytes for the rest of the message you'll have to look in the SysEx charts (the fine print at the back of the synth manual).

A finished Matrix 1000 editor in the Cubase MIDI Mixer. Read on to learn how to create your own...
THE MATRIX 1000
As an example of the use of SysEx with the MIDI Mixer, I'm going to show you how to create an editor for the Oberheim Matrix 1000. I chose the Matrix 1000 because it is quite popular, and is unusual in being totally devoid of front panel knobs and switches for editing — the only way to program it is via SysEx. As you will see, much more than programming is possible with the MIDI Mixer... Even if you do not have access to a Matrix 1000, the examples below should help you decipher the SysEx charts of your particular synthesizer.
The Matrix 1000 is a 2-oscillator analogue synth module, and it has the traditional analogue advantage that its voice structure is conceptually quite easy to grasp. Provided you can get at the parameters, it is therefore pretty easy to edit. Fortunately its SysEx implementation gives you access to all sound parameters and, unlike some other manufacturers I could mention, Oberheim have made an effort to clearly document this aspect of the instrument, starting on page 42 of the owner's manual. A quick glance at the text reveals that the required message — remote parameter edit — has this format: F0 10 06 06
F0 — Head of SysEx
10 — Oberheim ID
06 — Matrix 1000/6/6R ID
06 — command type (parameter change)
<parm> — parameter number
<val> — parameter value, the XX variable in the message
F7 — end of SysEx
A list of all Matrix parameters and their numbers is found on pages 46 to 51 of the manual. Here you can find the filter cutoff and resonance, LFOs and envelopes, among many other parameters. You can now choose any of these, and type directly into the message line in the MIDI mixer. Note that parameter numbers will have to be converted into hexadecimal notation as they appear in standard decimal in the list. A good starting point is the VCF (voltage controlled filter) Initial Frequency, parameter number 21 (15 in hex). Create a mixer object as before, name it, set its MIDI channel and select the required object type — a fader or a dial. Now place the Cursor in the message line by clicking over it with the mouse and type in 'F0, 10, 06, 06, 15, XX, F7'. The value range should be 0 to 127.
Moving the fader now should have immediate effect on the Matrix, regardless of the current sound. There is no need to worry about the original patch; the Matrix 1000 has an edit buffer which means that any editing is non-destructive unless you decide to save it.
If you're a Matrix 1000 owner you'll know that, as its name suggests, it contains 1000 sound programs, and that only 100 of these can be accessed via program changes; the rest have to be set manually. Well, not quite — not if you're using the MIDI Mixer. Oberheim allow for a SysEx command that lets you change the bank, and the format of the message is as simple as it gets: F0,10, 06, 0B,
F0 — Head of sysex
10 — Oberheim ID
06 — Matrix ID
0B — command type (bank change)
<bank> — bank number
F7 — end of SysEx
As there are 'only' 10 banks, numbered 0 to 9, you should set the range to min=0, max=9, and type 'F0, 10, 06, 0B, XX, F7'. A dial should prove ideal for this function, and you might want to throw in another dial object to send standard program changes ranging from 0 to 99. These two dials should let you select all 1000 sounds.
MATRIX MODULATION
SysEx messages are fine for editing sounds, but when it comes to real-time modulation — dynamically controlled filter sweeps, varying LFO modulation depth, and so on — SysEx data suffer from several limitations. To start with, SysEx messages are much longer than other MIDI events. SysEx events are given a high priority, which means that other events in your sequence/song simply have to wait while the SysEx data are transmitted. This normally results in timing problems, and notes may even go missing. Large amounts of data can sometimes fill up an instrument's MIDI buffer, causing error messages and other undesirable problems. This does not mean that SysEx is useless, or inadequate in any sense, it just means that it is not designed for real-time parameter changes.
The ideal MIDI messages for changing parameters in mid-sequence are controller changes. Most synthesizers and almost all samplers provide very little support for parameter change via controllers, although this is changing now with the introduction of General MIDI. The Matrix 1000 is an exception, providing numerous ways of modulating the sounds. As its name suggests, the Matrix allows for no less than 20 sources to modulate 32 different parameters. You can, for example, set LFO1 to modulate VCF frequency, then set velocity to affect VCF resonance and so on. You can define up to 10 such modulation paths, allowing you to create highly responsive sounds. The modulation matrix can best be understood in terms of a patchbay with 20 sources at one end and 32 destinations at the other end, with 10 patch leads to make the connections between them.
To assign the source-path-destination matrix, we use the second remote parameter change command: F0, 10, 06, 0B,
F0 — Head of sysex
10 — Oberheim
06 — Matrix ID
0B — command code
0A — path 10
0F — source #15, aftertouch
XX — value
0A — destination #10, resonance
F7 — EOX
Now move the fader or dial you created to show 65 or 63, and play your master keyboard. Any aftertouch events should have a noticeable effect on the sound. If not, try selecting another sound and move the object again. You need to move the object whenever a new sound is selected because the Matrix resets all changed parameters. A little experimentation will be needed to get the best results, and for mathematical reasons beyond the scope of this article, a value of 64 will actually zero the path, while a value of 63 or 65 will have maximum effect.
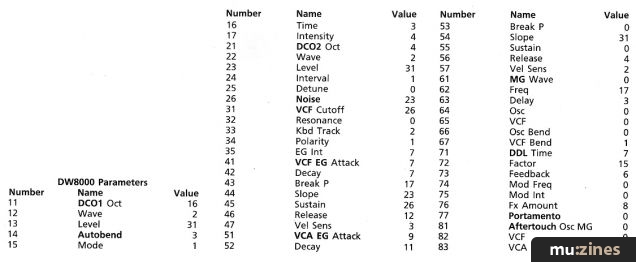
You can go one better than using on-screen sliders to achieve dynamic control over sound parameters, by using a modulation wheel or some other hardware controller. The Matrix 1000 has several modulation sources that are driven directly by continuous controllers (see list), but the most useful for our purposes is Pedal #1. This defaults to controller #4, but you can change it to any controller number you like, to accommodate whatever controller data you can most easily generate with a 'real' slider, knob, or pedal. To use the last example as a starting point, once you have sent a SysEx message similar to that, but with Pedal #1 in place of aftertouch, you can use your chosen hardware controller — data entry slider or whatever — to control filter resonance in real time. This is quite easy to do: simply change the source to number 16 (10 hex), which, as you can see from the list of controllers and sources on this page, is Pedal #1. Now suppose that you want to use a data entry slider (DX7 style) for dynamic control; you'll need to change the Pedal #1 assignment from controller #4 to #6. To do that, press the Select button on the front panel until the Ext Funct LED is lit, then press 4. You can now use the up and down keys (+/-) to change this value to anything between 0 and 121. (It is best to avoid controller #7, as this is reserved for MIDI volume). If you set it to 6, and use the MIDI Mixer object to set the matrix, your data entry slider will become a powerful and expressive tool, allowing you to generate glorious analogue filter sweeps, pulse width modulation, rotor effects, and much more...
I hope that, after reading this article, you will start checking the small print in the back of manuals to find more hidden features that can be unleashed with the help of the Cubase MIDI Mixer. Next month, I will be taking a closer look at registered and non-registered parameters, what they are, and how they can be used to create more expressive sounds with the help of the MIDI Mixer.
A disk to occompony this article, featuring example mixer maps for the Matrix 1000, Allen & Heath Saber desk, and General MIDI synthesizers, will shortly be available through our Software Support pages.
Series - "Cubase MIDI Mixer Programming Clinic"
Read the next part in this series:
Cubase MIDI Mixer (Part 2)
(SOS Nov 92)
All parts in this series:
Part 1 (Viewing) | Part 2
More with this topic
Media Link |
Using MIDI Controllers |
MIDI Basics - First Steps In Multi-timbrality |
The Performing Art (Part 1) |
Technically Speaking |
Technically Speaking |
MIDI 2.0 Is Here! |
MIDI and the Micro |
MIDI Muting - Sound Workshop |
The MIDI 1.0 Specification |
Adrift On An MTC - MIDI Time Code |
Browse by Topic:
MIDI
Also featuring gear in this article
Clash of the Titans
(MIC Oct 89)
Cubase 2.0
(SOS Dec 90)
Cubase In-depth
(MIC Jan 90)
Dream Sequences (Part 1)
(MX Dec 94)
Dream sequences (Part 2)
(MX Jan 95)
Dream Sequences (Part 3)
(MX Feb 95)
Dream sequences (Part 4)
(MX Mar 95)
Dream sequences (Part 5)
(MX Apr 95)
Dream sequences (Part 6)
(MX May 95)
Dream sequences (Part 7)
(MX Jun 95)
Hands On: Steinberg Cubase
(SOS Jan 92)
Oberheim Matrix 1000 - Synth Expander
(MT Aug 88)
Oberheim Matrix 1000
(SOS Sep 88)
Steinberg Cubase - Version 3.0 Software
(MT Sep 92)
Steinberg Cubase 3.0 (Part 1)
(SOS Apr 92)
Steinberg Cubase 3.0 (Part 2)
(SOS May 92)
Browse category: Software: Sequencer/DAW > Steinberg
Browse category: Synthesizer Module > Oberheim
Featuring related gear
An Old Pro - Steinberg Pro24 Amiga
(SOS Feb 91)
C-Lab Explorer 1000 - Atari Editing Software
(MT Sep 89)
Macintosh or Atari?
(SOS Jan 88)
Oberheim Matrix 6 - Synthcheck
(IM Apr 86)
Oberheim Matrix-6
(SOS Jan 86)
School's Out
(MIC Aug 89)
Six To A Dozen - Oberheim Matrix 6
(EMM Jan 86)
Software Tracking - Steinberg Pro24 Software
(EMM Sep 86)
Steinberg Cubase Audio
(SOS Nov 92)
Steinberg Cubase Lite - For the Atari ST
(MT May 93)
Steinberg Cubeat
(SOS Nov 90)
Steinberg Cubeat - Atari Sequencing Software
(MT May 91)
Steinberg Pro 24 - SoftwareCheck
(IM Oct 86)
Steinberg Pro24 Version III
(SOS Aug 88)

Steinberg Software Page
(SOS May 88)
Steinberg Software Page
(SOS Jun 88)
Patchwork
(EMM Aug 86)
Browse category: Software: Sequencer/DAW > Steinberg
Browse category: Software: Editor/Librarian > C-Lab
Browse category: Synthesizer > Oberheim
Publisher: Sound On Sound - SOS Publications Ltd.
The contents of this magazine are re-published here with the kind permission of SOS Publications Ltd.
The current copyright owner/s of this content may differ from the originally published copyright notice.
More details on copyright ownership...
Topic:
MIDI
Series:
Cubase MIDI Mixer Programming Clinic
Part 1 (Viewing) | Part 2
Gear in this article:
Software: Sequencer/DAW > Steinberg > Cubase
Synthesizer Module > Oberheim > Matrix 1000
Gear Tags:
Feature by Ofir Gal
Help Support The Things You Love
mu:zines is the result of thousands of hours of effort, and will require many thousands more going forward to reach our goals of getting all this content online.
If you value this resource, you can support this project - it really helps!
Donations for September 2025
Issues donated this month: 0
New issues that have been donated or scanned for us this month.
Funds donated this month: £0.00
All donations and support are gratefully appreciated - thank you.
Magazines Needed - Can You Help?
Do you have any of these magazine issues?
If so, and you can donate, lend or scan them to help complete our archive, please get in touch via the Contribute page - thanks!


