


Magazine Archive
Home -> Magazines -> Issues -> Articles in this issue -> View
Software Support | |
Hints, Tips & News From The World Of Music SoftwareArticle from Sound On Sound, February 1990 | |
Two jam-packed pages of hints and tips from the world of music software.
C-LAB
NOTATOR & CREATOR UPDATE
Version 2.2 is now being sent to users registered with Sound Technology who have returned their order forms. If you have an older version and did not receive the update letter, you may not be registered: please ring (Contact Details) and ask for C-Lab Support.
C-LAB JOIN THE MUSIC NETWORK
C-Lab will shortly be appearing on The Music Network: would users who would like more details please get in touch with C-Lab Support. We would also like to hear from users who are equipped with modems etc, who think they might benefit from a non real-time read-only open conference with one-to-one electronic mailing for responses.
QUANTIZE & GROOVE
The parameters you see in the box called 'Track', to the right of the Pattern window, are the track parameters. They are what C-Lab call 'Play' parameters. This is because they act in real time on the MIDI data only, as it flows out of the MIDI port when the program is running; they have no effect on what is actually in the memory of the computer. You can see this if you look in a track's event editor - using, say, Compress Velocity has no effect on what you see, only on what you hear as it plays.
The advantage of Play parameters is that you can instantly change them or zero them whenever you like: they are non-destructive to the data, and so greatly enhance the process of making music. The only other way to change data is by actually altering it in the memory ('data-altering'), something which takes relatively more time than Play parameters, and is not reversible.
Among these real-time Play parameters are Quantize and Groove, which benefit from all the advantages that Play parameters bring. These two are, however, most unusual, in that you can see their effect in the event editor as well as hear it. This is because of the special nature of quantisation - it would be very difficult to edit notes in the event list if they did not reflect their true positions! How the program allows you to see the effect of quantisation, yet still allow it to be altered in real time, is one of life's little secrets.
There is another major difference between Quantize and Groove, and the other track parameters. 'Data-altering' functions such as Process Data, Transform etc, or the action of manipulating events in the event editor, permanently change the data in memory (reversible only by a second use of a data-altering operation). For instance, if you use Process Data to alter the transposition of 10 bars of a track to an octave higher, this will make that change permanent for those 10 bars. If you then use the Transpose track parameter (remember this is a Play parameter!) to transpose the whole track, the track as a whole will be transposed, but the 10 bars will still be an octave higher than the rest of the bars. This 'making permanent' of data applies to the Transpose, Velocity, Compress, Delay, Lowest and Highest track parameters. Quantize and Groove are the exception to this rule: it is not possible to make quantisation permanent under any circumstances.
You can certainly use the data-altering Process Data function to use a different quantisation for part of the track, but this is not a 'permanent' change as with the other parameters described above; if you were to alter the Quantize or Groove track parameters anytime afterwards, this would overwrite the supposedly data-altered segment you had chosen under Process Data. So remember not to touch either of these track parameters after you have altered the timing of notes within the track, or they will be altered again to the new value you have selected.
NEW WAY TO RECORD: KEEP BUFFER
There is a way of recording music in Notator and Creator without the use of any of the recording functions! The way it works is by allowing you to retrieve the data you enter while the program is in Play mode, but not recording. You have probably seen the 'Free' display at the top-left scrolling down as you play; well, this represents a temporary buffer, whose data you can retrieve. The rules are:
(1) Ensure the buffer is empty before you press Play (pressing Stop or many other commands will do this) or you will also be storing the data that you played while you were in Stop mode (the buffer is constantly storing data, whatever the mode).
(2) Ensure you are in Play mode (pretty obvious, really, otherwise you are going to be storing data that relates to one time position!), and do not press Stop before pressing...
(3) ...the [Shift]+[Return] keys, which will store all the data that was in the temporary buffer into the current track - ensure the current track is empty before you store.
(4) After a certain number of events, the buffer will automatically empty itself, but it is certainly large enough for most situations.
With this feature, you can rescue a good solo that you played while you were just jamming along to already recorded events. Basically, by removing the need to go into 'official' Record mode, you are simplifying some situations.
DONGLE CONTACT
If you are in the habit of keeping your dongle in the computer at all times, do remove it every few days and re-insert, ensuring that it is fully pushed in. This keeps the electrical contacts fresh.
# SYMBOL IN EVENT EDITOR
Along the left-hand edge of the event editor, in the event list partbox, the # symbol acts as a display filter for System Exclusive data and various other P-USER data that is not crucial to everyday use. The symbol is normally disabled (grey). This is why a SysEx dump from a synth appears to be unsuccessful, since only the SysEx header will be visible until you click the '#' symbol!
HOLLIS RESEARCH
TRACKMAN SOFTWARE UPDATE
All Trackman owners should by now have received their free Trackman Version 2 software update. In the unlikely case that you have not received yours, please contact First Rate/Hollis Research.
INSTALLING TRACKMAN 2
When installing the new version of Trackman, make sure you copy the new TRACKMAN.INF file as the format for this file has changed and is incompatible with the earlier versions. After starting Trackman set the MIDI menu, footswitches, Drum List and Mix Automation (on the Goodies menu) items as desired. Use Save Preferences so that these settings will be correct the next time you load Trackman.
BOUNCE AND EXTRACT SHORT-CUT
A fast access to the Bounce and Extract dialogue boxes has been provided. Hold down the Shift (for Extract) or Alternate key (for bounce) and click and drag the track selector from the source track to the destination track. The relevant dialogue will appear with the track filled in for you.
MIDI FILES
We can confirm that MIDI files from Trackman will work with EZ Score Plus. They are transferred via a utility called 'MIDI Mover', which is available from Hybrid Arts UK.
The only difficulty we have found so far with MIDI files concerns the different clock resolutions used by various software companies. The MIDI file specification allows for different clock resolutions, but it is not always possible for the software to convert correctly between them. If the program has a clock resolution of 96ppqn, or a resolution which is a multiple of this (eg. 192, 384), it will probably work. Fortunately, this includes the majority of popular software. If you attempt a transfer using a program with an unusual clock resolution, you may experience timing problems.
MIDIMAN PROFILES
We are compiling MIDIman control files in preparation for the MIDIman software update. We already have contributions from leading users and new profiles designed by Sound On Sound's Martin Russ. If you have written a profile which other musicians may like to use, why not send us a copy. In return, we will send you a disk containing the very latest profiles.
THE DIGITAL MUSE
VIRTUOSO STE UPDATE
Changes that Atari have made for version 1.4 of the ST operating system, as used on the new Atari STE, have made it necessary to make a very minor update to the Disk page of both Virtuoso and Prodigy. Users of the STE can obtain an update direct from The Digital Muse free of charge. Users of any other machine will not need the update, which purely provides compatibility with the new operating system, and does not contain any new features.
MIDI TIMING PROBLEMS
A lot has been said about MIDI timing problems, and Virtuoso is particularly useful for solving these, due to its high resolution and accurate event play timing.
Because of MIDI's relatively low bandwidth, those of you writing 8th or 16th note based songs may experience problems with the timing of some of the percussive sounds. This is because although MIDI events may seem to be sent out of a MIDI port simultaneously, they are actually sent serially, one after another. If a fairly heavy arrangement is all quantised to the same value, then a large number of notes will need to be transmitted at the same time, and consequently some will have to wait until the others have been sent - a potential cause of MIDI timing delays.
It is not uncommon for over 30 notes to be playing at the same time on some music, and it can take MIDI as long as 30 milliseconds to send all 30 notes. The result is that if some of the most delayed notes happen to be important percussive notes, the delay will become noticeable and upset the groove of the song.
It is possible to avoid this by manually giving the notes their correct priority, using either the real-time processing DDL-Fine parameter, on the Block page, or the note event processing on the Zone page. By advancing these percussive parts by one clock, you will advance the timing of the drums by only one millisecond or less (at 120 bpm). This will ensure that they are the first events played, as all notes with a timing of one clock pulse earlier will always be played before the other notes that are left exactly on the beat. It may be useful to delay some of the least timing-critical note events, such as strings or pads with slow attacks, by a few clocks from the exact quantise time, to ensure that these have the least timing priority of the data to be sent.
Because of the high timing resolution of Virtuoso, this moving of note start times has a minimal effect on the feel of the music, while still allowing the priorities of the notes to be specified. Using this method with a sequencer which has a lower resolution would cause timing changes that were possibly more noticeable than those caused by MIDI in the first place.
It is a fact that the MIDI Thru sockets on most equipment can cause delays of around 5ms each, so that if you use many synths daisy-chained together via their Thru sockets, rather than connected in a 'star' arrangement from a Thru box, you may find that at the end of the line the delay on percussive parts has started to become audible. Add to this the time that the instrument being played actually takes to respond to the MIDI message, some of which are notoriously slow, and you begin to experience further problems.
Virtuoso has a time offset parameter, amongst the real-time parameters on the Block page, that can be set to advance the data on a particular track in 1ms steps, so that the correct advance can be specified to offset any delays building up in the system. Advancing events in this way will also help with the previous problem described above.
In the near future, The Digital Muse will be making available MIDI expander hardware which will provide more full bandwidth MIDI Outs, controlled by a separate processor, so that MIDI events can be spread across multiple outputs, thereby lessening the pressure on the Atari's single MIDI Out.
PRODIGY 12" REMIX
When composing music on Prodigy it is often useful to record all the parts that will be used during the song onto one section of the block, eg. the same 8-bar loop. This enables overdubs and Instrumental arrangements to be recorded while the feel and groove of the song is uninterrupted and fresh in your mind. By muting some recorded parts while others are added, simulating the separate parts of the song, the whole song may be built up over the same loop.
When complete, the separate parts will need to be transferred to their correct location in the song, and this can easily be done using the Copy/Step On function on the Process page, muting the parts that are not necessary for the section being copied.
An alternative to this method, which leaves the choice of which tracks are to be used until a little further down the production path, is to copy all the recorded tracks 20 or more times and then to use the Process page 'wipe' function to erase the sections of music wherever they are not wanted. You can then hear the effect of each wipe as you do it, allowing you to judge if the feel of the track is exactly right stage by stage; it also encourages the wiping of more irregular sections of the arrangement than will be cleared if you just copy the sections, minus the tracks that are not wanted at the time.
At the end of this operation you should have a 12" remix type of arrangement. Of course, this technique can also be used with Virtuoso, using the wipe function on the main panel.
STEINBERG
INSTALL PROGRAM
The Install program in Cubase V1.5 is new and is only of interest to you if you own any of the following hardware devices: SMP24, Timelock, Midex and Midex+, C-Lab Unitor or Fostex R8/MTC1.
The Install program initialises MROS drivers that the software will have available at any one time, which saves a great deal of memory. Do not adopt the belt and braces approach and install all the drivers. This is not really a good idea, as what you are telling Cubase is that you have a Timelock and an SMP24 simultaneously connected to the ST's printer port, and Midex and Unitor connected to the cartridge port - which is of course impossible; most Atari computers only have one of each of these ports.

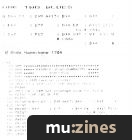
Cubase V1.5's new MIDI Manager page.
MIDI MANAGER
The MIDI Manager window is something very new to Cubase; it allows user-defined graphics of various types to be positioned on the same screen at the same time. There is an upper limit of 128 objects and they are all quite independent - they certainly don't have to be all of the same type, ie. only MIDI volume sliders or MIDI pan controls etc. You can have any combination, anywhere on the screen (or off it if you want to use the window sliders).
What seems to be confusing people is that the Record button on this page says 'recording not possible' if pressed. That does not mean that this is a Set Up page to establish volumes etc and then leave them. The Mode sub-menu next to the Snapshot Camera can be set to Local, Update or Write mode. Just select 'Write', set Cubase running (in cycle mode can be very useful) and move the mixer objects. Rewind Cubase and stay in Write mode, then start Cubase. The mixer objects replay your actions. Without stopping Cubase it is possible to edit the sliders on-the-fly, and the Toolbox has options to remove the mix information for each object quite separately. The three options are: from the beginning of the part up to the Left locator; from the Right to the end of the mixer part; and between the Left and Right locators.
Don't forget that these mixer objects can transmit user-defined System Exclusive parameter changes to control such things as filter sweeps on your synth.
A full understanding of the functioning of the mixer objects is quite important. Moving the graphics on screen will produce the MIDI output that you define for the object. Cubase actually records special mixer events in the memory, and these are 'played' out through the objects. So the right mixer map must be present to recreate the MIDI data when Cubase plays back.
It is recommended that you create your own library of mixer maps and/or objects, because the individual items can then be merged into any particular map if you need its function, without always having to recreate them from scratch each time.
MUTE RECORDING
New functions in Cubase allow the recording of mutes as Part data. However, it is important to remember that if you record a mute which cuts the output of the track that contains the muting data, no more muting functions will occur (including the unmute of that track) until that track is manually unmuted. You can have as many mute tracks as you want, and don't forget the multiple mute memories stored in the ALT+F1 to F10 locations.
TRACK COPY
The Track Copy functions are as easy as dragging the name of the relevant track to the place you want a new track to be, while holding down the ALT key. Remember two additional things: the same action with the Control key held produces a Ghost track, and with no key held it moves the track. These last functions are essential when memory is short or re-ordering of tracks gives a better logical grouping of the parts on the screen.
In Version 1.5, there have been some minor but highly significant changes to the mouse operations on the Arrange window. The Song Position can be set by double-clicking the mouse on the song ruler - no need to reach for the ALT key anymore.
If the Shift key is held, the Drag box used for selecting parts for move/copy/edit etc can be started within a part itself, without the computer thinking that you want to move that part itself. Try this in tightly packed parts and the increase in flexibility and convenience is enormous.
PLEASE NOTE: Product information contained within these pages is supplied directly by the software manufacturers, their UK distributors or agents. The intention is to provide a 'bulletin board' service for SOS readers who own or use software for any type of computer. Although we will occasionally publish new product information, the intention is to publicise update/upgrade news, bug fixings, hints and tips about any piece of software and computer peripherals, it is therefore up to all software companies to keep us posted.
More from these topics
 Software Support - Hints, Tips & News From The World of Music Software |
 Musical Micro |
 Card Tricks - Music On The PC |
Software Support - Hints, Tips & News From The World of Music Software |
 Apple Notes |
PC Notes |
 Lab Notes: MUS1 - With the New Miracle Ingredient - STG |
 Amiga Notes |
 Stagecoaching (Part 1) |
Amiga Notes |
 Chip Parade (Part 1) |
 When Is A Computer? |
Browse by Topic:
Computing
Sequencing
Publisher: Sound On Sound - SOS Publications Ltd.
The contents of this magazine are re-published here with the kind permission of SOS Publications Ltd.
The current copyright owner/s of this content may differ from the originally published copyright notice.
More details on copyright ownership...

Sound On Sound - Feb 1990
Donated & scanned by: Mike Gorman
Feature
Help Support The Things You Love
mu:zines is the result of thousands of hours of effort, and will require many thousands more going forward to reach our goals of getting all this content online.
If you value this resource, you can support this project - it really helps!
Donations for June 2026
Issues donated this month: 0
New issues that have been donated or scanned for us this month.
Funds donated this month: £0.00
All donations and support are gratefully appreciated - thank you.
Magazines Needed - Can You Help?
Do you have any of these magazine issues?
If so, and you can donate, lend or scan them to help complete our archive, please get in touch via the Contribute page - thanks!