


Magazine Archive
Home -> Magazines -> Issues -> Articles in this issue -> View
A Handy Way To Solve Sticky Control Problems | |
Article from Polyphony, February 1978 | |

Electronic music has always been an attractive alternative for radical innovators in music composition or performance. One of the reasons is that the music circuitry is easily adapted to many different modes of control. Some synthesists still use the AGO keyboard, but others are die-hard anti-keyboardists, and their search involves use of push switch matrices, ribbon controllers, light sensors, computer controllers, and on and on. One of the earlier alternative controllers was the Joystick. Its popularity was no doubt founded on the fact that with one hand you could easily control two independent parameters. Later joysticks even added a third axis of control which was accomplished with rotation of the stick itself. The applications of a multi-parameter controller are many. It can be used by itself, or in conjunction with other controllers for a WIDE range of effects — probably more so than any other type of controller (excepting a computer, I guess).
Before getting deeply involved with some sample applications for the Joystick, it is important to understand that the Joystick is a much more versatile and wide range controller than the more common AGO keyboard. The musical keyboard offers precision repeatability of a limited set of musical notes. But, the Joystick has a much wider range of outputs, with capability to generate an infinite number of outputs across its range. Additionally, it has the capability to generate TWO variable outputs PLUS a third trigger output. With all this increased capability comes an increase in operational subtlety and lack of applications comprehension. The point is that you must be prepared to experiment and PRACTICE in order to LEARN how to get the most from this new controller system, just like you had to LEARN how to play the AGO keyboard. The reward will be the ability to do some very complex control of a large assortment of synthesizer equipment from one efficient controller device.

Fig. 1: Front Panel
PANEL LAYOUT AND CONTROL OPERATION
Note that the front panel graphics (See Figure 1) are arranged to depict the interaction of the rotary controls with the Joystick. The "X" and"Y" designations are derived from standard notation for designating a point in a two-dimensional graph. The X axis refers to horizontal, or side-to-side Joystick motion. The Y axis refers to vertical, or up-and-down Joystick motion.
The controls in the X section operate exactly like the Y controls, except they affect a different axis of motion.
RANGE — This control determines the amount of output voltage change for a given amount of Joystick motion. Clockwise rotation will give increased output changes.
BIAS — This control determines the amount of initial voltage at the output; or in other words, the center voltage of the Joystick at rest. Any movement of the Joystick will then cause an increase or decrease in this center bias setting. Minimum settings of the BIAS controls represents an output of approximately -4 volts. Clockwise rotation will increase the output voltage to a maximum of about +4 volts.
TRIMMERS — The ribbed, thumbwheel sliders adjacent to the joystick mechanism acts as fine tuners for the setting of the Joystick.
POWER — Sliding this switch to the right applies power to the internal circuitry. Be sure to switch off the power when not in use to help prolong battery life.

Fig. 2: Rear Panel
On the rear panel (See Figure 2):
GND — This jack should be patched to a common ground point on the equipment which the Joystick is to be controlling. This connection is REQUIRED for proper operation of the Joystick.
TRIG — This output jack provides a trigger output of approximately +8 volts when the metal section of the Joystick shaft is touched.
As with the front panel controls, the operation of the rear panel is similar for both the X and Y sections.
OUTPUT — The voltage which is the resulting summation of Joystick location, control setting, and so on, appears at this jack. This jack will be patched to the module you wish to control with the Joystick.
INPUT — This jack allows for input of complex control waveforms which can then be selected, processed and outputted from the Joystick. This jack is used for some very special modes of operation, and will be discussed in detail in a later section.
CV/MULT — This switch selects the normal variable voltage mode of operation (GV), or the multiplier mode of operation (MULT) which uses the previously mentioned INPUT jacks.

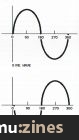
Fig. 3: Pitch Bending Patch
One of the first things that comes to mind when you set a knob, lever, or thumbwheel next to a keyboard is pitch bending. Since you will be bending the pitch up and down, it makes sense to use the "Y" (vertical) axis for this application. First, MAKE SURE that you have a patch cord connected from the Joystick GROUND jack to a ground jack on your 4761 Wing (or to the chassis of the unit to be controlled, if it is from another system). The Y output should be patched into the VCO(s) to be controlled IN ADDITION TO the normal control voltage from the keyboard, sequencer, etc. (See Figure 3). The front panel Y RANGE should be set to minimum. We do not want any control voltage at the output when the Joystick is at its resting center position, so the Y BIAS should be set to approximate mid-position. While inserting and removing the patchcord from the output jack, make slight adjustments to the Y BIAS control until there is NO pitch offset when the Joystick is connected to the VCO. This is the point where there is 0 volts bias at the Joystick output. If you can get close with the BIAS control, then you can fine tune the zero setting with the Joystick trimmers. Now, you should be able to play up and down your keyboard and selectively add upwards or downwards pitch bends of up to a musical fifth or so. If you prefer more dramatic, wide-range pitch sweeps, the RANGE control can be advanced as desired. NOTE, though, that the BIAS, control will need to be reset to provide the initial 0 volt output.
Those of you who are involved with experiments in microtonal or macro-tonal tunings can use the front panel BIAS control to generate the positive (for microtones) or negative (for macrotones) voltage offset required. The wide range of the BIAS control should provide for a world of new tonalities to be explored.

Fig. 4: Pitch Bend/Tone Control Patch
Now let's take the basic patch a step further. Let's add variable filter sweep which is controlled by horizontal (X axis) motion of the Joystick. (See Figure 4). Use an additional patch cord to connect the X output to the control input of a VCF. For now, use the Joystick as the only input to the filter. With this patch, moving the Joystick up and down while playing the keyboard will produce pitch bends, while moving the Joystick from side to side will act as a tone control. When using this patch you will probably find it most useful to have the X RANGE set between midpoint and maximum for the widest range of tonal changes. This demonstrates a very important design concept — instead of using one set of master controls to adjust range and bias of both Joystick axes simultaneously, we chose to retain separate control for each axis to allow for the widest range of possible applications. On Joysticks which have only one master range control, you would never be able to execute the preceding patch without having either an extremely narrow (thus ineffective) filter sweep range or a very wide pitch bend range (thus difficult to use for bends of a few semitones only).

Fig. 5: Adding Trigger Control
To add a third dimension of control to our expanding patch, connect the TRIGGER output to the input of an envelope generator. (See Figure 5) Then, patch the output of the envelope generator into the control input of the VCF which is being used as a tone control for the X axis. With these connections completed, you will be able to bend pitch, change the tone manually, AND touch the metal shaft of the Joystick to get an automatic sweep of the filter. NOTE that when using the touch TRIGGER function, all Joystick movement must be done by holding the end of the shaft.
From these basic applications, we can expand to using the Joystick trigger output to initiate a sequenced pattern, or better yet — to single step through a sequenced pattern. This way, you could have a number of preset voltages for a tonal sequence, a chord progression, or perhaps just use the sequencer gate outputs to enable various patches through a number of VCAs. Now, whenever you touch the Joystick shaft, the sequencer will advance one stage, and the next preset "patch" will be heard. By now your creative instincts should be getting a few ideas worth experimenting with. TRY THEM ALL. Experiment with having the Joystick control every module in your system. This will help you derive or stumble upon some good control combinations which you may not have thought of yet.

Fig. 6: Filter Sweep Range Control
The Joystick can be used as a range determinant for control signals in several ways. Probably the most obvious is to use the Joystick as a bias voltage generator, with the front panel BIAS control set to the lower 50% of its range. This will cause a negative voltage output from the Joystick which, when summed with the control signal you wish to process, will provide enough negative bias to keep the other control signal from having any effect. However, as the Joystick is moved to sweep the output voltage up to 0 volts or greater, the other control signal will have more and more potential for forward biasing the module it has been attempting to control. Finally, when the Joystick is outputting 0 volts, it is as if there is no Joystick patched into the circuit, and the control signal will have its full sweep range applied to the module. Let's apply this technique in a situation where we want to have a variable amount of repeating sweep on a filter. (See Figure 6) Patch an oscillator signal through a low-pass or band-pass type VCF, and out to your amp. Select the variable output of a control oscillator, and natch into the control input of the VCF. Set the variable output of the control oscillator to produce about 2 to 3 volts output. Patch a Joystick output into the VCF along with the control oscillator. If you can hear the Low Frequency Oscillator (LFO) sweeping the filter a bit, decrease the setting of the Joystick Bias control to sum in a bit more negative voltage. Now, when the Joystick is moved, the sweeping oscillation of the filter should become increasingly predominant. With a bit of practice, this type of Joystick operation can add a significant amount of expression to your playing by providing fade-in vibrato, left hand modulation depth, or envelope range or emphasis control for doing accents, etc.
A slightly different method of control waveform range processing is through the use of the MULTIPLIER function which is accessible from the rear panel of the Joystick. In this mode of operation, the fixed joystick bias voltage is switched out, and an input is provided so the Joystick mechanism can be used to select variable amounts of a control waveform of your choice. This will provide a smoother variation in amplitude than the previous method, as we no longer need to bring the control waveform above a certain threshold before the control signal can take effect. Now, the Joystick will cause a true amplitude control of the input waveform.

Fig. 7: External Signal Multiplier Patch
Additionally, a bias offset can be added to the output, if desired, through the use of the front panel BIAS control. This could serve as an initial range setting before the Joystick introduces the various amounts of the modulating waveform. As an example, let's use the Joystick for envelope amplitude control. (See Figure 7) We will use a signal from an ADSR to be fed into the Joystick. Patch the ADSR output into the Y INPUT jack on the rear of the Joystick. Slide the Y selector switch to the MULT position. Patch the Y OUTPUT to the module you wish to control — let's use a filter again. In the MULTIPLIER mode of operation, you will probably find it easiest to have the RANGE control set in the 50% to 100% area. This will provide the widest range of Joystick action. Initially, set the Y BIAS control to approximate mid-position. While playing the keyboard, the Joystick can be moved up or down to cause an increase or decrease in the deflection range of the filter. Experiment with different RANGE and BIAS settings, as there are limitless possibilities with this mode of operation. How about having the Joystick trigger the module it is processing? In figure 7, remove the ADSR trigger from the keyboard and connect to the Joystick trigger output.

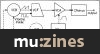
Fig. 8: Total System Control
If you are ready to move up to some VERY subtle and tricky control configurations, you can try complete system control with the Joystick. At first, this type of patch is frustrating, as it is hard to get the degree of control required to produce "musical" sequences. A typical system control patch would be similar to that shown in figure 8. Once you have refined this type of Joystick operation, you will have gained a very powerful new tool for the expression of the extreme subtleties of your music.
More with this topic
 Dave Bristow on the Yamaha DX7 - Yamaha DX Keyboards |
 Synth Computers |
 It's Cee Zee! (Part 1) |
 The Future of Synthesis |
 All About Additive (Part 1) |
 A Deeper Wave - Wavetable Synthesis |
 Sounds Natural - The Acoustic Guitar (Part 1) |
 Patchwork |
 Practically FM (Part 1) |
 Customise (Part 1) |
 Total recall - Cosmology |
 Modular Synthesis - Producing String Sounds (Part 1) |
Browse by Topic:
Synthesis & Sound Design
Publisher: Polyphony - Polyphony Publishing Company
The current copyright owner/s of this content may differ from the originally published copyright notice.
More details on copyright ownership...

Polyphony - Feb 1978
Donated & scanned by: Mike Gorman
Feature by Marvin Jones
Help Support The Things You Love
mu:zines is the result of thousands of hours of effort, and will require many thousands more going forward to reach our goals of getting all this content online.
If you value this resource, you can support this project - it really helps!
Donations for April 2026
Issues donated this month: 0
New issues that have been donated or scanned for us this month.
Funds donated this month: £0.00
All donations and support are gratefully appreciated - thank you.
Magazines Needed - Can You Help?
Do you have any of these magazine issues?
If so, and you can donate, lend or scan them to help complete our archive, please get in touch via the Contribute page - thanks!