


Magazine Archive
Home -> Magazines -> Issues -> Articles in this issue -> View
A Beginner's Guide to Korg's AI Synthesis | |
Article from Sound On Sound, April 1990 | |
Phil South examines the ins and outs of programming various aspects of AI synthesis, as used in Korg's 'M' and 'T' ranges of synthesizers.

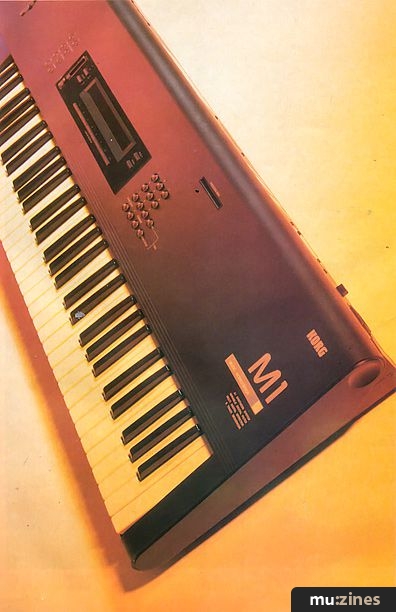
When I first heard a Korg M1 I thought "Wow!", and like others I knew that before very long I would own one. Not only were the M1's preset sounds better than anything I'd ever heard, the programming seemed quite straightforward too. But it appears the old problem of sticking to preset sounds is with us again, just like it was for the Yamaha DX7. Not wishing to fall into the trap of living off other people's RAM cards or playing the presets forever, I approached the job of learning to programme the machine. To my delight I discovered that, far from being complex like FM synths, the M1 actually has very little going on behind its cheekplates. Its strength lies in the fact that, programming-wise, it's more like an old analogue machine or even a Casio synth than it is a DX7.
METHODS AND MEANS
The core concept behind AI synthesis is that you have 'multisamples', very skillfully made short looped samples, as your basic waveform, which you then treat with your filter, modulation, and amplifier etc, to create the finished sound you want. The multisamples fall into five categories: sampled instruments, drums, looped rhythmic patterns, attack transients, and single cycle waveforms. To complete the sounds there are a pair of hi-spec 16-bit effects processors which you can employ to add studio quality stereo reverb, chorus, flanger, echo, aural exciter, early reflection, and more.
The layout of the sound generating apparatus within the M1 is quite simple, but there isn't much to see on the outside to suggest this. The few buttons on the front panel plus a lengthy series of 'pages' in the small LCD window don't give you much idea of how the components of the sounds are linked.
The Oscillator sets the waveform, and is altered by the Pitch Envelope Generator (EG) over time, and the Pitch Modulation Generator (MG) modulates the pitch continuously. The Oscillator then feeds into the Variable Digital Filter (VDF). This sets the basic tonal quality, and then is altered as the VDF EG shapes the sound over time, and the VDF MG modulates the filter continuously. Finally, the output from the filter goes into the amplifier (VDA).
The basic sound level is set by the VDA, and the VDA envelope shapes the sound over time. (There is no VDA MG, so don't look for it.) After the amp the sounds are routed to the effects section, where the sound is passed through the two Digital Signal Processors (DSPs). The sound normally goes through both effects and comes out of the left and right sockets in stereo at the back of the machine - unless you route one of the effects to the other two sockets. These techniques aren't really programming, and are outlined in the owner's manual, so look them up there. The velocity sensing, keyboard tracking, aftertouch and joystick controls affect all three stages of the sound.
STARTING FROM SCRATCH
In the old days (and we're talking pre-MIDI analogue here), when you set up a synthesizer 'patch' you began by setting all the knobs to zero and making sure all you were getting through the speaker was the raw untreated oscillator. The same principle applies here. In order to start programming with the M1 you have to be able to hear a raw wave tone from the oscillator, and this is difficult with all the effects and filters in the way. There is no 'Initialise Voice' function on an M1 (argh!), so before you create a sound you have to construct a basic patch by hand (or modify an existing one). I've provided you with a suitable patch (see 'Basic Patch' sheet) which sets everything up so that you can hear the raw sounds clearly on their own. Set it up on your machine and save it to a convenient number on your RAM card, or on disk with your editing program. This way you can copy it into memory and get cracking immediately.

When you're designing a sound, you pick the basic tone by flipping through the 100 multisounds using the Up/Down buttons or the ever so useful Value slider. It doesn't matter if the sound isn't right at first, as you can always replace it later when the rest of the patch is in place. Some of the multisounds have their own attack, like breath on a sax or chiff on a pan pipe, and so need little treatment at the attack stage. But listening to the multisounds, you realise how much of the character of a sound is in the filtration and enveloping of the timbre. Most of the 100 PCM multisounds have a distinctive character in a patch, but sound like a rather tuneless buzzer with everything turned off. This is more true of the last 23 multisounds than of the rest, because they aren't samples of real instruments but perfect mathematical waveshapes, like sine, pulse and triangle, and additive synthesis versions of certain popular instruments.
BASIC NOISES
It might help you to design sounds if you can visualise the way the internals of the machine are organised.
First off you have two options in Program mode, to work with single or double oscillators, called Double or Single mode. In Single mode you have one oscillator (and so one multisound) and this can be shaped using the filter and amplitude envelope generators. In Double mode you have two oscillators and therefore the choice of any two multisounds. You can use two different sounds which blend together to make a totally new sound. You could even have a sound composed of two timbres which swap over (using Delay Start) very gently in time, like a 'pling' which swoops into a string pad; or even a distorted guitar which crossfades with a sine wave for a 'very metal' feedback effect. A lot of skill can be put into just using simple combinations of multisounds, so experiment with various combinations.
If you're using Double mode, try shifting the Osc Balance back and forth to see how lesser and greater values affect the way the two sounds blend together. Also try different octaves. This may sound obvious, but unlike many a normal sampler, the M1 sounds are made up of totally different samples the higher or lower you go, which opens up different timbral variations.
In Double mode you have access to another couple of menu options: Interval and Detune. Detune shifts the pitch of Osc2 by small amounts, to create simple phasing and flanging effects, and Interval moves the pitch by whole notes, giving rise to musical intervals of thirds, fifths, and sevenths etc. Although you can and will use these options to good effect on multisounds which are the same, you can also use them with sounds which aren't exactly the same - with some quite startling timbral effects possible. Here's a detuned piano, for example:
OSC1 00:A.Piano L99 8'
OSC2 00:A.Piano L99 8' I+00 D-12 DL00
Other effects which are of great interest are those using NT sounds - attack transients or short, non-tuned, percussive sounds. Here the sound is the same pitch whichever key is pressed. These are useful for adding thumps or plinks to sounds which don't have them. The NT sounds are Kalimba (24), Lore (43), Pole (47), Block (49), Drop (53), Breath (55), Pluck (57), VibeHit (59), MetalHit (62), Dist (65), BasThumb1 & 2 (67 & 68), and VoiceWv1 & 2 (75 & 76). Since these are all independent of the main timbre, you can allow these transients to be modified by velocity and aftertouch for fully rendered sounds. Try adding BreathNT to Tenor Sax, or Mute TP, and note the difference. How about adding PluckNT to a Guitar1? Or a flexible velocity-sensed BasThumNT1 to a Fretless?
PITCH EG
You may be fooled into thinking that altering the pitch envelope over time is a technique only used to create whacky spaceship noises, but don't forget that many percussion sounds are characterised by a fast, distinctive, pitch swoop at the beginning, as the surface of the drum is rapidly bent and released.
The pitch envelope can be controlled by the way you voice the notes, if you use it like any other envelope. What I mean is that you can make the pitch move either as you press the note, after you've let it go, or even both. Just start the pitch at 0 for the attack, but let it fall or rise on release or decay. The pitch change effect can also, if used in the right sound, be made to imitate the rather fast sound of water dripping. Try this on the M1's preset 68 (Block) and modify it to be a new sound called WaterBlock like so:
OSC1 Pitch EG S+60 AT03 A+99 (All others to 00)
The best values to begin with for Pitch EG are start levels between -20 and +20, attack levels of 00, and attack times of between 01 and 08. An attack time of 07 or 08 produces a very good effect with velocity sensing of around the -45 to -55 mark. In this ballpark, only the harder notes have any slide in the pitch.
We have just discovered that the Velocity Level and Time settings are affected by the EG Level Vel Sens and the EG Time Vel Sens. These parameters set how strongly the pitch of the note reacts to being struck. If you bang the key hard then you get more of a change than if you strike the key softly. You can remove this effect by setting the G and H keys to zero, whereupon the notes will sound the same no matter how hard you hit them. Another pitch trick is to detune the oscillators by small amounts: use the same sound in the two oscillators but set the start levels to, say, -10 on one oscillator and +10 on the other.
FILTRATION
The VDF lets you set the basic tone colour of the sound, using the VDF Cutoff and the EG Intensity. The tone of a sound can be completely altered as the filter trims away the higher frequencies to lesser or greater degrees. The VDF EG determines how the filter will change over time, and the Intensity sets the amount of effect that the filter envelope has on the sound it is treating. So, if the Intensity is set to a low figure, the tonal change is greatly reduced.
The filter envelope has six elements: attack, decay, breakpoint, slope time, sustain, and release. Breakpoint is an interesting feature here, allowing you to start another envelope after the initial one. For instance, the sound sweeps down almost immediately out of hearing range for a moment, then swoops up again a moment later to grow to a full fruity pad sound. How this works is that after the breakpoint level, another envelope is executed up to the sustain level.
After the breakpoint and sustain, the filter then waits for the release. The release time and level determine the slope of the release and how far and how quickly the filter shuts down the sound. Or opens up the sound, because if the release level is a positive (+) value higher than the sustain level, it will do just that.
VDF Vel Sens is the next most important parameter to consider. This is partly responsible for a lot of the character in the M1's acoustic sounds. (The high quality samples are primarily responsible for the realism.) In an acoustic instrument, like a piano, the high frequency harmonics of the sound are deadened if the notes are played softly. The harder the notes are played, the harder the sound becomes and the more high frequency harmonics cut through. So if the instrument you are designing is acoustic in nature, use VDF Vel Sens. (If your instrument is synthetic, you might try to give it character with the Pitch EG Vel Sens and Pitch EG Time, as detailed in the Pitch EG section.)
With VDF Vel Sens, if the last four values are set to '+', the time or duration of that part of the envelope is shortened. If they are set to then the duration is increased. So you can set the attack to '+' and release to for a short attack and long release. A zero value in the parameters means that it stays the same, and velocity has no effect on the envelope duration.
Keyboard tracking is a popular filter effect, especially on the old Casio synths. The way it works is that either side of a 'central' key, which you can specify, the tone alters the higher and lower you go up or down the keyboard. For example, if the Cutoff Frequency of the filter is a positive number, the note becomes brighter the higher in pitch you go. Certain instruments have this quality of the higher notes being brighter than the lower ones, and some the complete reverse. Like the guitar on the preset 04 (Guitar1), where the notes become slightly duller as you move up the 'fretboard', just as nylon acoustic guitars do.
LEVEL CONTROL
As on any synth, the M1 has an envelope generator for varying the amplitude - the Variable Digital Amplifier. Changes in the loudness of notes over time are modified using the VDA EG, and variations in loudness are controlled by the VDA Vel Sens. This section works in the same way as the filter and pitch velocity controls, so I won't reiterate. But one interesting effect is to have the velocity sensing playing one oscillator when struck softly, and another when played hard. All you do is set the VDA Vel Sens for Osc1 to play loud when struck softly, and softly when struck hard. Then set Osc2 to do the reverse. This switches the sounds when you play harder. Try it on bass guitar: you could have a soft bass guitar sound, as played with the fingers, which switches to a hard thumbed slap bass when you strike the key harder. Got the picture?
MODULATION
The Pitch and Filter Modulation settings are available from the Pitch MG and VDF MG pages. These parameters affect the whole sound. You can think of Pitch MG as vibrato and VDF MG as 'wah-wah'. Both these effects can be brought in after a delay (so that the note starts pure then modulates after a pause) or they can be assigned to the joystick for dynamic real-time control.
The significant features of Pitch MG, as far as sound design are concerned, are waveform selection, frequency, delay, and intensity. (Osc Select and Key Sync are nice features but contribute little to innovative sound design.) Frequency sets the speed of the vibrato. Delay selects the delay between pressing the note and starting up the modulation. Intensity selects the depth of modulation, or how strongly the pitch oscillates back and forth. The waveforms available are triangle, sawtooth, and square wave. The triangle wave oozes up and down, the sawtooth or 'ramp' wave slides up then drops down suddenly (or up suddenly and slides down if you have it backwards), and the square wave is a hard digital on/off effect.
The modulation can be made as pronounced or as subtle as you like by adjusting the intensity. Try a pronounced square wave effect for that sci-fi alarm sound. As a project, see if you can create a simulation of an air-raid siren. It can be done very easily, because I've got one called '4minWarnin'. Clue: try using a low octave trumpet or sax and use the filter to muffle it.
VDF MG is similar in operation to Pitch MG, except instead of varying the pitch you are varying the filter cutoff point for continuous throbbing or 'wah-wah' effects. A good source of film sound effects.
AFTERTOUCH
There are three things you can control by aftertouch (pressure on the keys after attack), and these are pitch, filter and volume.
It's not a good idea to do downward pitch bends on a patch like brass (for that Thomas Dolby 'Airhead' sound) because you'd have to hold the keys down until the sound dies. No, it's better to have such things set up as pitch envelopes. Where aftertouch-controlled pitch bending does come in handy as a hands-on performance tool is in simulating something like an electric guitar with a vibrato arm - it keeps your joystick hand free to do the twiddly Van Halen riffs, see?
Aftertouch on pitch modulation is, in fact, one of the most popular applications for aftertouch on the M1 (and most other synths). That soulful vibrato doesn't cut in until you squeeze the keys... But be sure to keep your Pitch MG intensity subtle or the audience will think you're being swung around their heads by a piece of string!
Finally there's amplitude or volume aftertouch. This means you can louden or quieten a note by finger pressure alone. This is not recommended for every sound but it has its moments. I prefer to make notes louder using this effect, as it allows you to wow the notes in time to the beat of the music. How about using the aftertouch as a mute on a trumpet, altering the VDA to close down the sound as you press harder?
JUST FOR EFFECT
Using the internal effects on your sounds is a bit of a cheat, to be frank, but it does add heaps of class to what would otherwise be quite mediocre sounds in most cases. Reverb covers a multisample of sins, as they say.
Using the twin effects is a fine art, almost as tricky as using the rest of the parts of the synth put together. There is always the temptation to employ far too much reverb, and have it sloshing around like floodwater drowning the sound. Instead, take a deep breath and think about how a sound would be in the real world. If you were miking up a sound, most of the energy would be going directly from the sound into the microphone. The reflections and echoes from the walls would be heard in the background, much more quietly. Obviously, big reverb settings have their place, but restraint should be practiced at most other times. Get all the massive room simulations out of your system before you play to anyone, that's my advice. Reverbs are at their nicest when subtle and clear. Use a realistic room size, bring the sound to the fore, and make the reverb sparkle with a bit of toppy EQ on the EQ FHigh setting.
Chorus and flange can add sweetening, but can also be harsh and weird. If you create a sound in Program mode with heavy flange, don't forget that in a Combi it won't have the same effects on it! Sounds obvious, I know, but you'd be surprised how different a voice can sound through different effects. Base your sounds around dry synthesis rather than effects if you want good multitimbral parts.
Early reflections can give you reverse sounds, especially if you use Effect only in the Dry:Effect balance. Try this with drum patterns for a really psychedelic treat. Try setting up odd beats using stereo/cross delay. Have the left channel beats at 293 and the right at 275, for example. And don't forget, you can also produce old-fashioned rock 'n' roll slapback reverb sounds using very short delay times. Overdrive and distortion are obvious and trustworthy friends in the guitar department, but why not try them on other sounds? All the remaining effects are described well enough in Korg's wafer-thin manual, so I won't duplicate them here.
Remember: it is important to get the effects balance right! Don't use Dry:Effect ratios of 59:41 or even 45:55 - try settings more like 70:30. Subtle effects are possible, but only if you balance them correctly.
SEQUENCER SECRETS
One way of overcoming the limitations of the M1's onboard sequencer memory is to chain pieces from the internal memory to the card memory. How about pulling one song out of the card slot while an internal one is playing, then plugging in another card for the next tune when it comes around? You could have three songs on a card, then an internal one, then three songs on another card etc, until you've run out of internal songs.
To make a sequence seem more complex than it is, how about using MIDI program changes? You can add program changes to an existing sequence by a couple of methods. If it's only a couple of sounds you want to punch in and out then best do it in step edit mode. Press Insert when you get to the spot where you want the change to occur - this inserts a new note. Then select the note pitch parameter and push the data entry slider all the way up to the top, then pull it down one stop with the decrement button. The note is now a program change command. The parameter shown to the right of 'Prog' in the display is the program number. Set that to the program you want to change to and there you are! (Note: there is nothing in the manual to tell you how to do this trick, so write it in the blank pages at the back of your own manual before you forget.)
SUMMING UP
There it is, everything I know. Well not everything, but I'll tell you the one about the peanut butter, the flippers, and the waitress some other time. Meanwhile, start programming!
Thanks go to Lee Groves of Hitmusic Productions for his unrestrained help and advice in the preparation of this article.
THIRD PARTY SOUNDS
Hitmusic Productions, (Contact Details).
Leister Sounds for the M1 are created in the USA and imported here by MIDI Music. There is a single disk available in self-loading format (for Amiga, Atari or PC) containing 100 Programs and 100 Combis. Price £29.99.
MIDI Music, (Contact Details).
More with this topic
 Sample + Synthesis - Programming Clinic |
 Making More Of The Kawai K5 |
 Understanding the DX7 (Part 1) |
 Advanced Music Synthesis - Inside the Yamaha GS1 & GS2 |
 Hands On: Korg M1 |
 The Sensuous Envelope Follower |
 Dave Bristow on the Yamaha DX7 - Yamaha DX Keyboards |
 Rock Around the Clock |
 Technically Speaking |
 Bio Music |
 Total recall - Cosmology |
 A Programmer's Guide to the Roland D110 (Part 1) |
Browse by Topic:
Synthesis & Sound Design
Also featuring gear in this article

Hands On: Korg M1
(SOS Mar 92)
Korg M1 - Music Workstation
(MT Jul 88)


Patchwork
(MT Jun 89)

Patchwork
(MT Aug 89)
...and 2 more Patchwork articles... (Show these)
Browse category: Synthesizer > Korg
Featuring related gear

Double Dutch SAM1 - Sample Expander For Korg M1
(SOS Nov 92)


Korg M1R
(SOS Jul 89)

Pandora's Box
(MIC Oct 89)
Browse category: Sampler (Playback Only) > Double Dutch
Browse category: Expansion Board > Cannon Research
Browse category: Expansion Board > InVision
Browse category: Synthesizer Module > Korg
Browse category: Software: Editor/Librarian > Power Tools
Browse category: Software: Editor/Librarian > Pandora
Publisher: Sound On Sound - SOS Publications Ltd.
The contents of this magazine are re-published here with the kind permission of SOS Publications Ltd.
The current copyright owner/s of this content may differ from the originally published copyright notice.
More details on copyright ownership...

Sound On Sound - Apr 1990
Donated by: Bert Jansch / Adam Jansch
Feature by Phil South
Ads for Gear in this article:


Help Support The Things You Love
mu:zines is the result of thousands of hours of effort, and will require many thousands more going forward to reach our goals of getting all this content online.
If you value this resource, you can support this project - it really helps!
Donations for July 2026
Issues donated this month: 0
New issues that have been donated or scanned for us this month.
Funds donated this month: £0.00
All donations and support are gratefully appreciated - thank you.
Magazines Needed - Can You Help?
Do you have any of these magazine issues?
If so, and you can donate, lend or scan them to help complete our archive, please get in touch via the Contribute page - thanks!