Magazine Archive
Home -> Magazines -> Issues -> Articles in this issue -> View
Steinberg Cubase Audio | |
Article from Sound On Sound, November 1992 | |
Steinberg's new version of Cubase for the Mac integrates the sophisticated sequencing facilities Cubase users know and love with audio recording and management capabilities. But how does it stand up to the competition? Mike Collins finds out.

Steinberg's Cubase Audio for the Apple Macintosh is the new version of their popular Cubase MIDI sequencer — with a difference. That all-important difference is that it lets you record audio as well as MIDI data. There is bound to be plenty of interest in this software, in particular from remixers who may want to chop up and reassemble an original recording, adding extra MIDI sections or overlays as they go. But there are two criteria which will certainly need to be satisfied for Cubase Audio to be the software of choice: are the audio handling capabilities as good or better than those of competing programs? And are the MIDI sequencing capabilities up to scratch in the same way?
There is plenty of competition on the Mac from Opcode's well-established Studio Vision (reviewed SOS February '91), and from Mark of the Unicorn's recent offering, Digital Performer. Digidesigns's Pro Edit software is also available as part of the Pro Tools system (reviewed SOS January '92), and offers more advanced audio facilities, but MIDI facilities which are limited to playback of MIDI files.
MAC CONFIGURATION
So what kind of Mac setup do you need for best results? Cubase Audio requires at least a Mac with a math processor (FPU), at least one NuBus slot, 4MB of RAM for the program itself — and even more RAM for best results! The Application Size defaults to 3MB, and 4MB or more is recommended when using large screens or to record larger amounts of data. So, if you wish to use MultiFinder or System 7 to run Time Bandit, Sound Designer, Alchemy, Galaxy, or other programs concurrently, you will easily need at least 8MB of RAM, with 16 or 24MB being much more desirable. Needless to say, the faster models of Macintosh, the new Quadras for example, are highly recommended!
CUBASE MIDI SEQUENCING
Before we go on to look at the audio capabilities of Cubase, I'll give you a rundown of the main features of the MIDI sequencer component of the software.
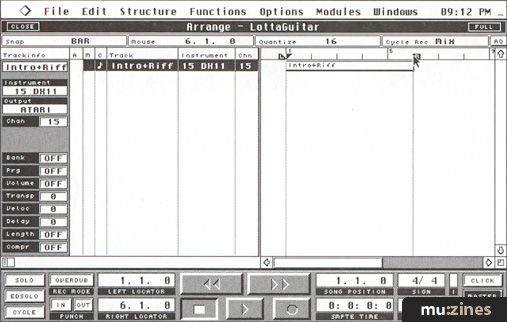
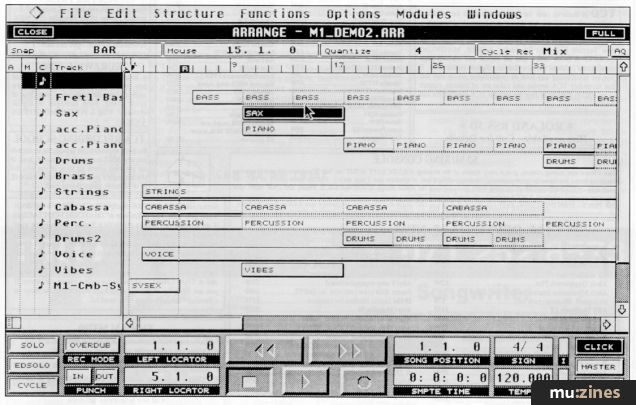
Your main work window is the Arrange window, which contains a list of up to 64 tracks and also has an overview display of the data in the tracks, similar to that available in Passport's MasterTracks and MOTU's Performer. There are actually six different 'classes' of tracks which you can use in Cubase Audio: MIDI tracks; Drum Tracks, which you can edit in the drum editor; Group Tracks, for playing back Groups; Mix Tracks, for recording and editing MIDI Mixer Tracks; Tape Tracks, for controlling Tape Recorders; and Audio Tracks. You can have several Arrange windows open at once, which could contain different versions of the same music, or could contain different pieces of music — or they could even contain the different sections of just one piece of music: verse, chorus, and so on. The Part display or 'overview' section of the Arrange window has a scrolling display of each track containing rectangular areas parallel to each track to show where data is present. These rectangular areas (called Parts) may be continuous throughout the duration of a track, or may be subdivided into smaller sections showing data recorded in different places in the piece of music.

Cubase's Arrange Window; note the 'waveform' symbols indicating that the 'GTR. 1' and 'GTR. 2' are audio rather than MIDI tracks.
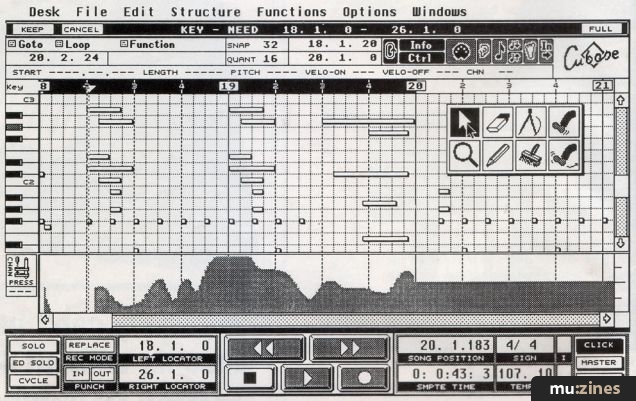
Editing features are pretty comprehensive, and you can edit any MIDI track using any one of four different edit windows. The basic Edit window displays the notes as rectangular bars on a grid similar to 'piano-roll' notation. List Edit is unusual (compared with other Macintosh MIDI sequencers) in that it is split into three sections, the left section being an event list editor, the centre being a different type of graphic editor which scrolls vertically, and the right section being a graphical note velocity editor. Drum Edit is more complex, and has a split display with drum sounds individually listed in a column at the left, with various parameters relating to these arranged in adjacent columns — rather like in the Arrange window. The right hand side of this display shows bars and beats running from left to right in a scrollable display, and shows the positioning of drum 'hits' as small diamonds within each bar. The display is similar in some ways to those on certain Roland drum machines, and is pretty intuitive to use for drum programming. Drum Edit uses a Drum Map customisable for your particular setup, and maps for several popular drum-machines are provided.
Score Edit displays the notes in conventional music notation on a stave, where you can move notes around using the mouse. This is an excellent implementation of this type of editor, with many great features (such as a chord name display) to help you when editing your music. There is also a Logical Editor which lets you make changes to your music based on logical or mathematical criteria. After setting up the 'conditions' in the Logical Editor, you then perform a function such as Quantizing or Deleting on the events which meet those conditions. You can use this to set all Velocity values to a specific value, or to create crescendos or diminuendos, or for many other useful edits. I found this to be particularly useful for editing drum parts, although it is a little complicated initially.
Cubase's quantisation options are extremely comprehensive, and additionally to those available in other sequencers, you have Analytic Quantize, which can be used with mixed straight notes and triplets, or with glissandos — pretty neat. Then there is Match Quantize, which lets you match the 'feel' of one Part with that of another, and there are several built-in 'groove' maps which you can apply to your tracks to create different rhythmic 'feels'. Groove Quantize is similar to Match Quantize, except that here the Quantize is defined according to the selected Groove Map. Quantising is normally non-destructive, so you can always re-quantise to any value or even turn quantising off altogether, unless you specifically 'freeze' or make the quantisation permanent. Finally, Automatic Quantize is similar to 'input quantise' as used in most drum-machine sequencers. Here new data is quantised as it is recorded, although this only works in Cycle Mode in Cubase.
Other features include a Mixer window which lets you control various functions on your MIDI gear — like volume, pan, mute and so forth — but can also work as an editor panel for various MIDI-controllable instruments and effects devices. Then there is the Interactive Phrase Synthesizer, but space prevents me from delving too deeply into this! The general idea here is that you can create new music from existing music, create one-finger accompaniments, generate complicated arpeggios, and much more. Finally, Tape Tracks can be used to control the Fostex R8, G16 and G24S tape transport functions directly from within Cubase Audio using the Transport Bar!
To sum up the sequencer section, I would say that it is definitely heavy competition for Performer and Vision. These other sequencers have their own particular strengths — as of course does Cubase, which boasts some features unique in the world of Mac sequencers — but the sheer 'weight' of features in Cubase should let you do just about anything you would possibly want a sequencer to do, even if the program is a little fiddly or confusing at times.
AUDIO RECORDING
OK, so here's the bit you've all been waiting for — the audio features. Firstly, you can record a virtually unlimited number of audio tracks, although the number of audio tracks which you can play back simultaneously is limited by the audio hardware you are using. Currently, you can get four tracks of audio out of Cubase Audio with Digidesign's Pro Tools system or two Audiomedia (I or II) cards; a single Audiomedia, or a Sound Tools (I or II) card will give you two tracks. Total recording time is only limited by your available disk storage space, so plan on getting the largest hard disk drive you can afford!
To record audio, you first change the track 'class' to the Audio type, and then open up the audio Monitors window where you select an audio record channel. When you click on Record in the audio Monitor, a file dialogue box appears, where you type in your filename and open it ready for use. You set the audio level at source, and the Cubase Audio meters indicate recording level and clipping. Once your levels are set, you set the Left Locator to the position where you want to start recording. Cubase punches out of record at the Right Locator if punch out is activated on the Transport Bar, otherwise it will continue until you stop recording or run out of disk space. When you stop recording you will see a Part in your audio track with a waveform display inside it.
I recorded a stereo guitar from my Digitech GSP21 Pro into two tracks, for left and right. When I finished recording, I opened the edit window with both Parts selected, and both tracks showed up as graphic waveforms in different 'lanes', ready for editing. The first editing function I tried was Banish Silence, to save disk space by removing any silence recorded in between bursts of guitar playing. The function is similar to Strip Silence in Studio Vision, except that the dialogue box where you set the threshold and 'sound window' has vertical and horizontal lines which you can use to define the threshold and the smallest section of audio which will be regarded as 'silence'. This is a welcome and intuitive improvement over the purely numerical system used in Studio Vision. Banish Silence is a non-destructive process, so you can always get your original data back if you mess up. Once happy with the results of cleaning up your recording in this way, you can erase all the unused segments of your audio recording, to reclaim disk space which you may well need for your next takes.

The Audio Editor window, showing guitar notes with silence 'banished' in between them. Note also the 'Q'-points.
AUDIO EDITING
The Audio Editor shows the audio events grouped into 'lanes', each containing all the events playing back on the same channel. An overview of the waveform can be displayed in the boxes representing the audio events, and you can also display the name for each audio segment, and a set of 'handles' within each event to let you clearly see the Start, End, and Q-point of each event. The Start and End handles can be dragged to right or left in the display to let you mask out sections of audio you don't want to hear, or to bring in sections you do want to hear. As you move these points, you can hear a small section of audio play just before or after the point you are moving. But the best feature is the Q-Points, which can be used for snapping the Event to musical positions when you move or quantise an event. The beginning of an audio event may not be exactly at a musically useful position — because of some sound just before the main part of a note, for instance. To compensate for this, the Q-point can be moved to a point up to 30 seconds into any segment to identify a musically significant position — such as a note which should fall on the first beat of the bar.
The Audio Editor has a Toolbox like all the other editors, containing: an arrow cursor for selecting events; a pencil tool for 'drawing' in information; an eraser tool; a 'scissors' tool to let you split events; a 'kick' tool to move events by small increments (one 'Snap' value at a time); a muting tool; a tool to let you ramp Event volume; and a monitoring tool. The Monitoring tool icon looks like a magnifying glass, and this type of icon is normally used to indicate a 'zoom in' (ie. magnify the view) function with most Mac software. In Cubase Audio, it serves as a way of playing back any event which you click on with the magnifying glass selected, so some kind of small speaker icon would have been more appropriate and intuitive to use here.
You can quickly duplicate events in the editor by holding the option key and dragging the original event to another place. Using this technique, you create an actual copy of the original data, which you would normally rename to distinguish it from the original. Another way is to hold down the Command key as you drag, in which case you get a so-called 'Ghost' copy, indicated by a dotted outline. If you then make any changes to the original audio segment from which this Event is taken, these changes will affect all the Ghost Events which use this segment.
Using the scissors tool, you can chop up your Events into smaller ones, thus creating separate segments for each new Event. Once your audio is split up into separate Events, you can then apply quantisation — which is likely to be far more effective with certain types of audio if you have carefully defined musically useful Q-Points on the actual pieces of audio which you want to quantise. You can also draw Volume levels for any Event directly into the waveform display, using the pen, the eraser, and the ramp Event volume tool.
AUDIO EVENTS
When you record some audio into a Cubase track, a sound file is created on disk containing this audio, and a Segment is created which is as long as your audio recording. An Audio Event which plays this segment is inserted into the Part you recorded into, and the Part is then displayed in the Arrange window to the right of the track. If you select this Part and open the graphic Editor, you will see this Audio Event displayed as a rectangular box lasting the length of the Segment and containing a waveform overview. Once you start to edit a newly-recorded soundfile, you will very likely create several segments, by banishing silence, or by cutting the file up with the scissors tool. If you split a complete audio Segment into several shorter Segments, the editor will then display several audio Events, each playing one of these shorter Segments at a particular time. If you then delete any of the audio events, the Segments you have defined will still be available for use elsewhere. I found all this a little confusing at first, but it started to make sense after a few days playing around with Cubase. You can think of a Segment as a pointer to a section of a sound file defined by a start point and a length. So if you make several Segments from one sound file, you can then play these back on different audio channels simultaneously, or repeat the same segments at different places in your music.
AND THERE'S MORE
When you enter recording in Cycle mode, your existing tracks, MIDI and Audio, will Cycle as usual. However, your new audio recording only creates one long file per track, not one file per 'lap'. One Segment with a length equal to that of the whole new audio file is then placed at the point where you began recording — as if Cycle had been turned off for that track only. It is then an easy matter to use the Arrange window or the Audio Editor to chop up this segment into shorter ones, each as long as the cycle. These Segments can then be stacked above each other in one track in the editor. Only one Event at a time can be played back per audio channel, but the advantage here is that you can use the editor to pick out the best take from all those created during your cycled recording.
You can Time Lock an audio track, which is very useful when working locked to timecode from video. For instance, you may have dialogue or sound effects recorded as audio, and are aiming to add music created using Cubase Audio's MIDI sequencer. If the audio is time-locked you can change the sequencer tempo while you're experimenting to find the best tempo to fit with the picture, without affecting the positioning of the audio with regard to the video.
Speaking of tempo, you can very easily match Cubase's tempo to the tempo of your audio material. Just select an event containing audio at the tempo you want to match, set the Q-point in the Segment to the beginning of a bar in the audio, or some other musically suitable place, then move the event such that this Q-point corresponds to some suitable bar position (such as the first beat of a bar) as indicated on the display of bars above the waveform display. You then hold the Shift key and highlight a number of sequencer bars to correspond musically to the number of bars you are hearing in the audio. A new Tempo is automatically created for you, and applied either to the Tempo setting on the Transport Bar, or to the last tempo value in the Mastertrack. With this feature, you can build up sequencer tempo maps to match any piece or pieces of audio you have recorded. Very handy. (I recently worked on an album of string arrangements for indie band Moose, recording the rough mixes of their album into Studio Vision and laboriously creating tempo maps by estimating the tempo variations in the 'live' recorded material by trial and error and sheer guesswork. Cubase Audio would have really taken the sweat out of the job, and provided a more accurate result.)
The Mixdown function mixes down audio events, and is used to move audio events from several tracks onto one track. This does not work directly on the audio, however, just on the display of tracks. The benefit of this operation is to show all your audio channels arranged vertically in 'lanes' in one edit window, so that it is easier to see how to position them. Remix is the opposite of Mixdown, and is used to split out onto separate tracks events which are on different channels but in the same track. The Mix Audio command (in contrast) takes all the audio between the left and right locators and mixes it down to a new sound file. This can be used to make a number of tracks into a stereo file, or you can mix a stereo file into a mono one.
There are also three ways to mix your digital audio, in the usual sense of mixing or 'balancing' the levels of the audio tracks. Each Event has its own Event Volume curve which you can draw in, in the Audio Editor. You can also use the Cubase Mixer window to dynamically control the volume and panning of the outputs on your hardware, and the Monitor Window has playback panning and volume controls that double up for the Mixer volume and pan. You can think of the Event Volume as an individual channel volume on a normal audio mixer, with the Mixer and Monitor volumes being equivalent in function to the group volumes, so that all events assigned to a particular output can be controlled as one using these volume settings.
Synchronisation is often a troublesome area with this type of software, and Steinberg offer an innovative feature to ensure that you are working with 100% stable timecode on your tape machine. The software can actually generate an audio file containing extremely stable SMPTE code, which you then record to tape. This time code is claimed to be more stable than that of many other SMPTE-generating devices, and is generated at the same sample rate as the one currently being used in your Song — so you get time code which is perfectly matched to your digital audio system, speed-wise. Of course, any small deviations in the replay speed of the SMPTE timecode can lead to loss of sync over a sufficient number of bars, and this can arise due to tape wearing and stretching. As in Studio Vision, there is a Calibrate to Tape feature to compensate for this type of variation.
Last but not least, Cubase Audio offers Time Stretch and Harmonize functions — but only if you buy Steinberg's Time Bandit software. You do a 'sub-launch' (to use Macintosh programming terminology) of Time Bandit from within the Audio Menu, and you return to Cubase Audio when you have completed your edits. A similar command allows you to use Digidesign's Sound Designer II software for its additional waveform editing features.
IS IT A WINNER?
Steinberg have had the opportunity to see how Opcode implemented their Studio Vision software, and have added specific features to Cubase Audio to improve various operations which can be problematic in Studio Vision. The way you can edit Banish Silence parameters graphically is very intuitive, and the provision of a stable timecode generation facility is very welcome. For people working to picture, the ability to have one section play out at one tempo, while a subsequent section plays in underneath at a different tempo is extremely useful if needed — and I could have done with the facility myself on recent sessions with Ryuichi Sakamoto for the Wuthering Heights film soundtrack. The Timelocking feature for the Audio tracks is obviously very useful on this type of session as well. The Match Tempo feature is just brilliant, and the ability to set Q-points to identify the musically significant portions of audio events to use when quantising makes working on tricky audio edits much easier in Cubase than in Studio Vision.
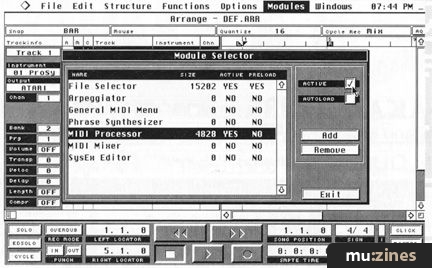
As far as the MIDI sequencer is concerned, you have Tape Tracks, the Interactive Phrase Synthesizer, the MIDI Mixer, Logical Edit, the MIDI Effect Processor, Drum Edit, Score Edit, List Edit, Graphical Edit — what more do you want? Well, how about a proper Markers window, like in Performer, where you can set 'in points' for any section of your music, lock these to SMPTE if you like, and click on them while the sequence is running, to jump instantly in play to any of these points, with no practical restrictions on the number of markers used? And how about a separate window in which to set up your MIDI Instruments, with enough space for characters available so that you can name the instruments in more user-friendly ways, as you can in the other Mac sequencers which feature Instruments? An overhaul of the graphic side of the program would not go amiss either, to allow the use of some colour on Macintoshes which support it — as most now do. (Steinberg say that they have not supported colour because they feel that there are no Macs on which its use does not significantly decrease screen performance — Ed.) I'd also like to see Steinberg keep their terminology more consistent with that used in other Mac sequencers.
Full compatibility with Opcode's OMS system would be another highly desirable feature — the good news is that it's on the way. Steinberg have already promised such support, and were in fact the first company to secure a licensing deal from Opcode. OMS compatibility would allow Cubase to be used with complementary Opcode software such as Galaxy, Track Chart, Cue, and so forth.
But enough of these relatively minor criticisms. I found myself growing to really appreciate many of the unique and well thought-out features which this software has to offer during the three or four weeks I spent reviewing it, and I will almost certainly find myself using Cubase Audio in preference to the competition on many sessions in the future. Nice one, Steinberg!
Further information
Cubase Audio for the Apple Macintosh £669 inc VAT.
Harmon Audio, (Contact Details).
STEINBERG CUBASE AUDIO - USER REPORT

For two recent projects I chose to use Cubase Audio rather than my usual program, Studio Vision, because of its approach and interface.
The first project was the soundtrack for a video to act as part of a gallery installation. This particular piece, by Rita Keegan, used digital video and still image manipulation (on the Mac!). My job was to produce a continuous soundtrack consisting of music, sound effects and atmospheres. What I needed to do was create continuous 'beds', which might be single note drones, musical passages, looped phrases or samples, or atmosphere type sound effects. The intention was to use the beds to provide continuity from one section to another, and over these sections would be laid sound effects and MIDI sequenced music.
The ability to import Sound Designer files was key and, while my usual program allows me to layer any type of event over another at any point in time, I was attracted by Cubase's object orientated approach, and the fact that moving events in relation to others doesn't leave me with a plethora of windows open and having to type in lots of numerical data. Cubase doesn't force the drum machine song and pattern approach, though you can work like that by grouping track parts and dragging them around on screen. A 'bed' could be a part in a track, a number of parts, or a single sustained note, and I loved being able to drag things around in relation to the beds and time and have almost all of the necessary (object orientated) information in one window.
There were problems, however. When trying to enter a new time position for a note event in the list window, the time value would flip to anything but the value I had entered. So I had to drag the event in the grid edit window and read the position on the info bar. A really weird one was when I tried to snip a Group Track part, and it disappeared along with the original parts — this has to be a bug.
I often found I had lost contact with my MIDI Time Piece via the desk accessory. The Cubase manual says you don't need it, but you can't change the cable routing without it, and I did have to do this when I brought in another synth. I also had to quit out of the program to use the Video Time Piece and stripe the video tape.
The other project involved working with Philip Linton, a songwriter who has written for, amongst others, Claudia Fontaine and Loose Ends. Philip has more recently taken to producing as well, and what is interesting is that some of the writing is still going on when the record is being produced. Vocals are often experimented with in this process, and Cubase Audio's digital audio features are ideal for it. First of all, recording the parts was smoooooth! I did not get one error message telling me my disk is too slow or fragmented — and this was on exactly the same hardware I use when Studio Vision gives me this message. It was also good to be able to drag different takes in and out of parts from the 'pool'.
I may just switch to Cubase Audio entirely, but I'll have to get up to speed, key commands and all, before that happens.
Derek Richards
Also featuring gear in this article
Browse category: Software: Sequencer/DAW > Steinberg
Featuring related gear
Clash of the Titans
(MIC Oct 89)
Cubase 2.0
(SOS Dec 90)
Cubase In-depth
(MIC Jan 90)
Cubase MIDI Mixer - Programming Clinic (Part 1)
(SOS Oct 92)
Cubase MIDI Mixer - Programming Clinic (Part 2)
(SOS Nov 92)
Dream Sequences (Part 1)
(MX Dec 94)
Dream sequences (Part 2)
(MX Jan 95)
Dream Sequences (Part 3)
(MX Feb 95)
Dream sequences (Part 4)
(MX Mar 95)
Dream sequences (Part 5)
(MX Apr 95)
Dream sequences (Part 6)
(MX May 95)
Dream sequences (Part 7)
(MX Jun 95)
Hands On: Steinberg Cubase
(SOS Jan 92)
Steinberg Cubase - Version 3.0 Software
(MT Sep 92)
Steinberg Cubase 3.0 (Part 1)
(SOS Apr 92)
Steinberg Cubase 3.0 (Part 2)
(SOS May 92)
Browse category: Software: Sequencer/DAW > Steinberg
Publisher: Sound On Sound - SOS Publications Ltd.
The contents of this magazine are re-published here with the kind permission of SOS Publications Ltd.
The current copyright owner/s of this content may differ from the originally published copyright notice.
More details on copyright ownership...
Review by Mike Collins
Previous article in this issue:
Next article in this issue:
Help Support The Things You Love
mu:zines is the result of thousands of hours of effort, and will require many thousands more going forward to reach our goals of getting all this content online.
If you value this resource, you can support this project - it really helps!
Donations for November 2025
Issues donated this month: 0
New issues that have been donated or scanned for us this month.
Funds donated this month: £0.00
All donations and support are gratefully appreciated - thank you.
Magazines Needed - Can You Help?
Do you have any of these magazine issues?
If so, and you can donate, lend or scan them to help complete our archive, please get in touch via the Contribute page - thanks!


