


Magazine Archive
Home -> Magazines -> Issues -> Articles in this issue -> View
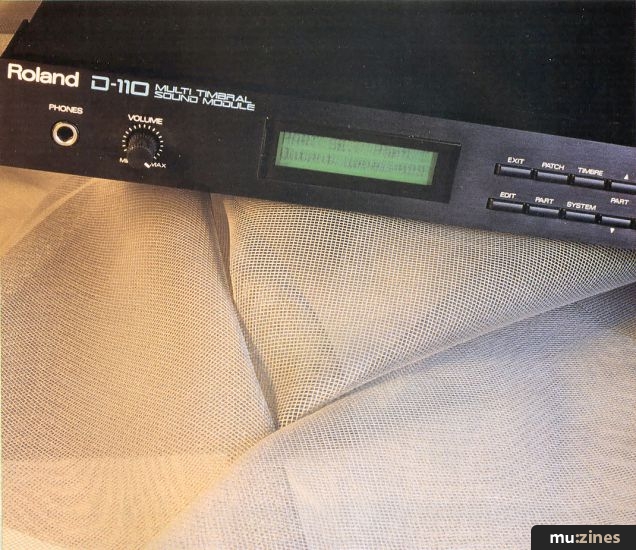
A Programmer's Guide to the Roland D110 (Part 2) | |
Article from Sound On Sound, August 1989 | |
PART 2: Greg Truckell winds up his two-part power user's guide to this popular LA expander with some applications techniques.
Ace programmer Greg Truckell winds up his two-part power user's guide to this popular LA expander with some applications techniques.

If you haven't read last month's article, then do yourself a favour and read it now. Some important concepts were introduced - like the fact that the D110 isn't just a 'sound module'. Since you're serious about your programming (aren't you?), you will realise the importance, at least from time to time, of programming a sound 'from scratch'. Tweaking presets is all very well if the studio clock is ticking away, but you will learn a lot more, and create fresher and more original sounds, if you really get to grips with the basic principles involved in creating a sound with the D110. The best way to start is with the plain vanilla tone, consisting of four plain vanilla Partials. Here's one I prepared earlier (Figure 1)...

Figure 1. Parameter list for the 'Vanilla' D110 program - a good starting point for experiments.
(Click image for higher resolution version)
KEYBOARD SCALING
Last month I mentioned some 'really means business' keyboard scaling facilities. Roland weren't kidding when they did this bit. Some 44 parameters govern scaling in one way or another. Thanks to the degree of flexibility Roland have given the D110, we are not restricted to the usual state of affairs, which is simply that a sound gets brighter and shorter as you move up the keyboard. Time for an example.
Suppose you want to fade from one waveform to another over a particular range of the keyboard. How would you do it? Let's suppose that the Partials in question are PCM waveforms, and therefore liable to exhibit formant-shifting (also known as 'munchkinisation' - remember?). It would be fairly easy to perform a keyboard crossfade from one Waveform Generator to the other - although it is worth pointing out here that a visual editing system can be a great help, and will actually encourage you to fully exploit programming features such as these.
A simple crossfade might be executed as follows: mute the high Partial (usually Partial 2; though it isn't important, when using stereo Structures, the low pitched end is often located to the left of the stereo image - as if you were sitting at a piano, harpsichord, or whatever, with the low strings on your left. This would be reversed for orchestral strings - the cellos and double basses sit on the right. Bear this sort of stuff in mind, chaps). Playing only the low pitched Partial, go as high up the keyboard as you can before the waveform becomes unbearably honky (technical stuff, eh?). Note the key where this occurs, C4 for example, and enter TVA Bias Point 1
If the zones overlap, all may be well. If they do not, then count the semitones between the limits of tolerance, divide by two, give any leftovers to the dog, and add the result to the lower limit. Make this pitch the new crossfade point; set Bias Point 1 to this value for both Partials. Now choose a high negative value (probably -8 or more) for the Bias Level for both Partials, and listen. You might have to make the Levels harsher; you might be able to tweak the crossfade zone a little wider. You might even want to introduce a second Bias Point - but I urge you to invest in a visual editing system before you try out this sort of thing. Imagine a Partial with two Bias Points; the Level on the other Bias Point is negative, but the Level on this Bias Point is more negative - which Bias Point is the higher pitched, what shape is the Bias curve, and how many children does Bob have? Lesser things have made madmen out of mathematicians.
So let's suppose that even after crossfading, the program doesn't sound right. Suppose that the samples playing at the extremes of the keyboard don't sound quite right close to the crossfade zone. What is needed is a third Waveform Generator to paint over the join, so to speak. If you feel the need to explore sampled possibilities first of all, then bear in mind that you might get further if you stick to the same instrument type. Pianos, strings, harps, guitars and basses are all stringed instruments, aren't they? If you can't find a third sample to do the job, then have a bash at messing about with the pulse width and filter resonance of an analogue waveform - you might be surprised at how close to the timbre you want you can actually get. I'm not suggesting that you could replace the samples with analogue waveforms. The formants that have caused this problem are also responsible to some considerable degree for the character of the instrument from which the sample was made. Reinforcing the main formant with a spare Partial can work wonders, but already we're starting to run out of Partials...
Now the trick is to crossfade in the new waveform at the point above the low sample, and out again below the high sample. Zoning techniques like this are common enough on samplers - so why shouldn't they appear on a synth? I love 'em. Reset the low and high Bias Points to their limits of tolerance, then set the third Partial's Bias Point 1 to > the low Bias Point and < the high one, choosing Bias Levels as high as those of the other two Partials. Easy, really. Some tweaking will no doubt have to be undertaken, but follow these rules and in the twinkling of a Chime Bar (Program 1/053) you should be well on your way to the perfect three-way crossfade. Figure 2 shows an example where the low pitched Partial needs more help from the paint job than the high pitched one. Note that this diagram hints that the third Partial has a lower TVA Level than the other two.

Figure 2. Pictorial representation of a 3-way keyboard crossfade on the D110.
VELOCITY CROSSFADES
Since we're talking classic sampler techniques, we might as well touch on the velocity crossfade. This is the technique you might employ when you want to create a particular effect across a range of keystrike velocities. Of course, the better you are at programming techniques such as these, the more demands you place on your keyboard technique - don't make your sounds so clever that you can't play them! A simple example. Suppose you want a tight bass sound with slaps only on the hard notes, and a mellower sound on softer keystrikes. Simple: unmute the Slap Bass Partials (1/060 and 1/082), and mute whatever other Partials you are using (1/063 and 1/084 or 1/085 perhaps). Set up the velocity response on the TVA that wrinkles your nose the most, then copy the TVAs to the relevant counterparts, and invert the polarity of the TVA Velocity Sensitivity. Tweak to taste - the middle ground may need some attention.
OK. I think that's enough for you digital pastry chefs to be going on with for now. It's time to remember that the D110 isn't just a synthesizer - it's eight synthesizers, and the kind of drum module only dreamt of but a few short years ago. It's applications time! I have to hope that you have a decent sequencer handy for much of this - but doesn't everybody have an Atari ST these days?
APPLICATIONS
Last month I made some suggestions about inverting the polarity of Pitch envelopes on secondary Partials of ensemble sounds. Well, how about copying the whole tone to another location, inverting the polarities of all the Pitch ENV Levels, and splitting the part across two MIDI channels. This is one of those places where artificial intelligence sequencing software (of which Dr. T's KCS II with PVG is the absolute tops) really comes into its own.
Take a big choral section, and split off half the notes to another MIDI channel. Don't use any criteria to decide which notes; we don't want a split keyboard or a velocity switch, just half the notes. Now play the two parts together, in all probability panned apart - but wait! Why not take the two parts, half them both, sending the two quarters to different MIDI channels panned to the opposite sides from their originals. Spread one sound, and a close relative with slightly different Pitch ENV, LFO settings, or whatever, across four or so parts, and you have the mother and father of an ensemble sound! The same technique can be applied to the likes of an acoustic guitar sound simply to scatter the notes about the stereo image a little.
Take your favourite over-the-top solo sound. (Actually, it doesn't really have to be over-the-top, but I'm in that sort of mood.) Record your well and truly fab solo, complete with pitch bends, modulation wheel or whatever. Actually, that's your lot as far as the D110 is concerned. No response to external modulation sources like aftertouch (key squeezy) or breath controller (spit down the sweater generator), which is something of a shame. Solo and brass sounds also suffer from the total absence of any sort of portamento. So what shall we do to liven up your solo?
Having neatly recorded your solo into your sequencer, make a copy on another track, and delay the whole track by some number of half notes, to create an echo which falls in with the groove. Now change the delayed track to another MIDI channel. Arrange your Patch so that your solo sound is on both MIDI channels. Now edit the solo sound - tweak the LFO settings, for instance, and rename and store the new sound. When both tracks are played together the result should have substantially more life and 'oomph' than a standard digital delay effect. It is a simple enough matter to reduce the velocity on the delayed track to make it less loud and bright than the original so long as your solo sound has been programmed to respond to velocity. You could also reduce the output level of the delayed Part.
Another variation on this theme only really works if your solo sound doesn't require heavy use of the modulation wheel. To use this trick, the modulation wheel should introduce only slight vibrato, perhaps at slightly different rates and/or depths on the various Partials. Copy your solo and delay it as before, then record some modulation on the MIDI channel of the delayed track. You can hear the results as you record them, and if they don't please you then simply erase the modulation wheel data. When this trick works, the result is a considerable thickening of the solo, just where you want it.
Of course, if you feel the need, you can make more than one delayed copy of your solo, each with different modulation or LFO parameter settings. You can also pan each Part separately, or even assign them to different outputs (D110 only here, chaps), and give them different external processing. One final variation on this theme that is worth mentioning is that the copies of the solo don't have to play later than the original. They might just as well appear a couple of beats before the solo, at a considerably reduced level. Add a liberal dose of reverb and you're well into spooky territory with this trick.
Those of you who read last month's thrilling installment will remember one of those little it's-not-in-the-book tricks, concerning ring modulation, whereby a Tone could be set up with the second Partial of Structures 2, 4, 5 or 7 muted, with the result that playing chords, or discords for that matter, caused rather unusual ring modulation effects. Partial Mute is a programmable parameter, remember; this means that all the weird noises you can get while looking for the ring modulation interval could be recorded as part of a sequence. This might be rather too Karlheinz Stockhausen for most of you, but stranger sounds than ever before are coming out of small studios these days, and with a decent groove you can get away with anything. Why not ring modulate a percussive PCM sample with chords derived from the bass line? Put on a silly hat and try out some of these things - once you have decided that you are in sound effect land, you can let loose the micro- or macro-tuning possibilities, too. I won't tell on you.
SEEING IS BELIEVING
Computer-based Visual Editing Systems (VES) have become something of a way of life for many programmers. Roland instruments are pretty well supported in this area; did you know that you can buy a VES for the Juno 106? I kid you not! Compare the front panel of a D110 with that of a Juno 106, and ask yourself whether it would be a good idea to invest in a VES. There are nearly a quarter of a thousand parameters to each D110 sound, and only eight up/down buttons.
My personal favourite visual editing system for the D110 is the Dr. T Caged Artist editor/ librarian - but then I like all the Dr. T software. The principles of computer-based visual editing are no doubt familiar to all of you by now. I'll wager that this familiarity hasn't stopped some of you from deciding that the money could be better spent elsewhere - shame on you! I bet you're still using 'Lonely Wolf' as well. Having heard about visual editing is not the same as having tried it. Go on, you'll be impressed. I have a confession to make. I was raised on synthesis with knobs on - but I wouldn't go back to it for the world. (I should imagine that shook the dust off a few Prophet users.) For me, it boils down to the simple fact that editing envelopes and keyboard scaling is easier on a computer screen than with a handful of knobs. You also have to bear in mind what the hell sort of a size of knob you would need to choose a waveform on a D110! Using a VES, whenever you want to select a PCM waveform, you select the current waveform for editing and are offered a list of waveforms from which to make your selection. That has to be more fun than a dose of the scrolls.
You see, I have come to the conclusion that manufacturers of beasts like the D110, or of just about anything else that you can bung in a rack for under a grand, have figured out some stuff about Bob Punter. Either [1] he's a computer freak, in which case he would rather have the advantages of visual and graphic editing, such as being able to draw envelopes and bias curves, or [2] he's a preset basher, in which case he'll be happy most of the time with what the almighty provided him, and in the few instances when he's moved to edit, a handful of digital parameter access controls will be all he's prepared to pay for, or [3] he has a knob fixation and will buy the hardware remote programmer anyway.
ROLAND PG10 PROGRAMMER
Which brings me nicely to the Roland PG10, a lumpy black plastic slab about the size of a decent box of chocolates, and much better for your teeth. Just what are the secrets of this black, magic box?
I must confess that I was a little bit surprised at the actual number of physical controls on the PG10. There are 21 buttons and eight sliders (which the handbook refers to as 'knobs'); a total of 29 controls, only 13 more than on the D110, and 11 less than on the D10 keyboard. The concept behind the PG 10 is rather elegant though; the sliders might better be called 'soft sliders'. Modes and Pages within Modes are accessed from clearly labelled multifunction buttons, with the value of 'multi' being kept pleasantly low. The 2x40 character backlit screen then displays as many parameter values and parameter name abbreviations as there are for each Page. A Page roughly corresponds to what you might call a module: you get a Page for one Partial's TVF Envelope, a Page for one Partial's Waveform Generator and Pitch Modulators. Sometimes, not all of the sliders are in use on a Page. It's obvious once you get your hands on it, rather like the Ensoniq ESQ1/SQ80.
I think I could just about get used to programming a sound on the PG10. Moving between Pages is intuitive - you are even prompted where appropriate. Moving between Partials and muting Partials becomes second nature after only a few minutes, as does finding your way from TVF to TVA to WG. A neat little feature exists whereby you can edit the same parameters on more than one Partial at a time, simply by selecting new Partials without deselecting the previous selection.
It's not all roses, though. There is something of a problem with the size of the sliders. These have a limited 30mm travel. This means that, for a parameter with 128 possible values, a travel of less than a quarter of a millimetre is required to adjust that parameter value by one step. That's worse than fiddly - and there are no increment/decrement buttons for fine adjustment. Parameter values are not shown as altered on the front panel of the connected instrument, and since Waveforms are only shown as Bank and Number on the PG10, this means you have to keep those printed lists of waveforms (the ones you covered in coffee three hours after you first unpacked the D110) nice and handy just in case you feel the sudden need to tweak.
There are a few more disturbing points about the PG10. As many of you will know, the D10 and D20 don't have front panel control over all the envelope parameters that actually exist beneath that front panel. The D10 and D20 have no TVF or TVA Level 3, nor the associated time parameters, nor will they allow the Pitch Envelope to have a non-zero Sustain Level. Odd but true, you can access these parameters from a D110 or from a computer-based visual editing program. Rather more odd, the PG10 doesn't support these parameters even on a D110, and if you tweak a D110's envelopes with a PG 10 you will lose control over these parameters. As if that were not enough to discourage you from buying one, the model Roland were kind enough to loan me had some nervous sliders. From time to time, a slider would put out a change of value, even if it had not been adjusted or even touched. I was playing a favourite flute sound from a remote keyboard, and was nowhere near either the PG10 or D110, when all of a sudden I was 50 cents flat. No fun. None at all.
THAT'S ALL FOLKS!
That just about wraps things up. I hope that all of this has sunk in, and that you will try out some of the techniques covered in this brief series. The Roland D110 may not have the programming potential of a Matrix 12, ESQ1, or Prophet VS, but it still has a lot to offer. Funny things can happen when you start to explore certain parameter combinations. I recommend that you approach programming your D110 armed with a trained mouse, a loaded can, and a silly hat. Making the most of your D110 will require a sense of humour as well as a sense of adventure.
Series - "D110 Programming Tips"
This is the last part in this series. The first article in this series is:

A Programmer's Guide to the Roland D110
(SOS Jul 89)
All parts in this series:
Part 1 | Part 2 (Viewing)
Also featuring gear in this article

Roland D110 - LA Synthesiser
(MT Sep 88)

Roland D110 LA Expander - The Expanded Expander
(SOS Jun 88)

Patchwork
(MT May 89)


...and 3 more Patchwork articles... (Show these)
Browse category: Synthesizer Module > Roland
Featuring related gear


Enhancing Your Roland MT32
(SOS Apr 88)

Geerdes D-Series Editor
(MT Mar 92)

Powertools D110 Editor
(MT Oct 89)

Roland MT-32 - Multi-Timbral Expander
(SOS Sep 87)

Roland MT32
(MM Oct 87)
Roland MT32 - Multitimbral Synth Expander
(MT Oct 87)

Roland MT32 Update & Editors
(SOS Jul 88)


Steinberg Synthworks D110 Multi-Editor
(SOS Mar 89)

Synthworks D-110
(MIC Dec 89)

Patchwork
(MT Feb 90)
Browse category: Software: Editor/Librarian > Dr. T
Browse category: Synthesizer Module > Roland
Browse category: Software: Editor/Librarian > Geerdes
Browse category: Software: Editor/Librarian > Pandora
Browse category: Software: Editor/Librarian > Steinberg
Browse category: Software: Editor/Librarian > Soundbits
Browse category: Synthesizer > Roland
Publisher: Sound On Sound - SOS Publications Ltd.
The contents of this magazine are re-published here with the kind permission of SOS Publications Ltd.
The current copyright owner/s of this content may differ from the originally published copyright notice.
More details on copyright ownership...

Sound On Sound - Aug 1989
Series:
D110 Programming Tips
Part 1 | Part 2 (Viewing)
Gear in this article:
Synthesizer Module > Roland > D110
Gear Tags:
Feature by Greg Truckell
Ads for Gear in this article:

Help Support The Things You Love
mu:zines is the result of thousands of hours of effort, and will require many thousands more going forward to reach our goals of getting all this content online.
If you value this resource, you can support this project - it really helps!
Donations for April 2026
Issues donated this month: 0
New issues that have been donated or scanned for us this month.
Funds donated this month: £0.00
All donations and support are gratefully appreciated - thank you.
Magazines Needed - Can You Help?
Do you have any of these magazine issues?
If so, and you can donate, lend or scan them to help complete our archive, please get in touch via the Contribute page - thanks!